FAQs
Your go-to hub for everything technical about Annie Sloan paint and products. Click from the list below to find out more about each frequently asked question.
Chalk Paint®, Wax and Lacquer
- How to use Chalk Paint®
- Using Chalk Paint® Wax
- Letting Chalk Paint® Wax cure
- How to care for a Chalk Paint® and Wax finish
- Using Chalk Paint® Lacquer
- Can you paint over stained wood with Chalk Paint®?
- Touching up or repairing damage
- Mixing your own Chalk Paint® colour
- Using Chalk Paint® on walls
- Using Chalk Paint® on floors
- Using Chalk Paint® on metal
- Using Chalk Paint® on kitchen cabinets
- Using Chalk Paint® on fireplaces, mantelpieces and radiators
- Using Chalk Paint® outdoors
- Using Chalk Paint® on tiles
- Using Annie Sloan paint as a chalk board
- Using Chalk Paint® in a sprayer
- Archived Chalk Paint® Colours
- Do I need to prep before using Chalk Paint?
- Painting over previously waxed of lacquered surfaces
Painting Fabric with Chalk Paint®
- Using Chalk Paint® on upholstery and leather
- Stencilling on fabric with Chalk Paint®
- Dyeing fabric with Chalk Paint®
Wall Paint
- Why choose Annie Sloan Wall Paint?
- Using Wall Paint on furniture or kitchen cupboards
- Using Wall Paint on previously varnished or gloss-painted surfaces
- Is Wall Paint breathable?
- How much does it cover?
- Is it only available in matte/flat?
- Will it freeze?
- Do I need a mixer?
- Do I need to prime?
- Is Annie Sloan Wall Paint durable?
- Is Annie Sloan Wall Paint eco-friendly?
- What’s the difference between Chalk Paint® and Wall Paint?
- How to avoid and clean marks on dark coloured Wall Paints
Brushes & Tools
Satin Paint
- What is Satin Paint and where can I use it?
- What is Satin Paint and what are its advantages?
- What should I use Satin Paint on?
- How should I use Satin Paint?
- Do you need to use primer with Annie Sloan Satin Paint?
- Is Satin Paint hard to maintain and is it long-lasting?
- What is the difference between Satin Paint and gloss, eggshell or silk paint?
- Is Satin Paint washable?
- What is the best type of paint for trim, baseboards and doors?
- Is Annie Sloan Satin Paint different than regular paint?
- What’s the difference between Annie Sloan Satin Paint and matt paint?
- Do I need to prep before using Annie Sloan Satin Paint?
Decorative Paints
- How to use Metallic Paints?
- Do I need to apply Wax or Laquer after using Annie Sloan Metallic Paints?
- Can I use Annie Sloan Metallic Paint outdoors?
Decoupage
Trade
FAQs
Chalk Paint, Wax and Lacquer
How to use Chalk Paint®
As a rough guide, one litre of Chalk Paint® covers approximately 13 square metres, or the equivalent of a small welsh dresser or china hutch.
For most purposes, one to two coats of paint are enough. Chalk Paint® adheres to almost any surface, and there is rarely any need to sand or prime before painting. See ‘Dealing with stains coming through Chalk Paint®’ for when to prime or sand before painting.
To get started, tip the paint pot upside down and shake before use. Then open and stir well. If paint is too thick just add a little water and stir. For the best results, we recommend using a good quality paintbrush like the Chalk Paint® Brushes to apply the paint.
Always finish Chalk Paint® with either Chalk Paint® Wax or Lacquer for protection.
You can paint Chalk Paint® straight over Chalk Paint® Wax without removing the prior finish.
Using Chalk Paint® Wax
Chalk Paint® Wax is the perfect complement for Chalk Paint®. It adds durability, deepens the colours slightly and adds a very light sheen. It’s really easy to get sensational results – just use a Chalk Paint® Wax Brush or lint-free cloth to apply the wax to paint. Remove any excess sitting wax with a lint-free cloth.
Finishing Chalk Paint® with either wax or lacquer is essential; it will seal your finish for years to come and protect from scuffs and water marks.
As a very rough guide, you will need one 500ml tin of wax for every 3-4 litres of paint. This will vary depending on how many coats of paint or wax you use to cover a piece. And it’s always best to have a little wax left over for touching up. With the lid tightly on, it will last indefinitely.
For more information on Chalk Paint® Wax, watch Annie’s instructional video by clicking here.
Letting Chalk Paint® Wax cure
After you’ve applied Chalk Paint® Wax, you’ll find that it will become dry to the touch very quickly. At this stage, it is still what you might call ‘soft’. It will start to harden as the solvents in the wax evaporate. This hardening process is known as ‘curing’. Curing can take between 5 and 21 days depending on ambient temperature.
You can use your finished piece straight away, but you may need to treat it with extra care until the wax has cured completely (you might want to use coasters, avoid sharp objects etc). Once cured, a piece of furniture painted with Chalk Paint® and finished with wax will stand up to normal wear and tear.
Chalk Paint® Wax is food-safe and toy-safe when completely cured. For more information see our Product Information page.
How to care for a Chalk Paint® and Wax finish
Generally, wiping lightly with a damp/dry microfibre cloth should be sufficient to clean.
Stubborn marks on waxed pieces can often be removed with a little Clear Chalk Paint® Wax on a cloth, which acts as an eraser. If you choose to use cleaner you will eventually wear away the wax, but if you would prefer to use a mild surface cleaner apply using a cloth and test in an inconspicuous area first. Regular use of cleaning products may require re-waxing over time.
Always use heat mats and coasters to protect your painted and waxed surfaces. Keep away from extreme temperatures or humidity. Like you, your finish prefers a moderate climate!
Waxes dissolve in alcohol, so using it on bars is not advisable.
Avoid aerosol spray polishes as they may contain solvents or silicone that could dissolve the wax.
Using Chalk Paint® Lacquer
As a guide, one 750ml tin of Chalk Paint® Lacquer will cover 19 square metres (204ft ²), but this will vary according to the absorbency of the material you’re painting. For best results the lacquer should be applied in very thin coats. Results may also vary depending on previous treatment of the surface.
When applying Chalk Paint® Lacquer, bear in mind that it is a ‘penetrating’ finish and can pull tannins or stains from the wood up through the paint. This can be especially noticeable on whites, manifesting as a yellow stain. Always test Chalk Paint® and Lacquer on several areas before you begin your project. If a stain appears, apply a stain blocker directly over the entire surface before painting and lacquering again.
For more information on Chalk Paint® Lacquer, watch Annie’s instructional video by clicking here.
Can you paint over stained wood with Chalk Paint®?
The porous nature of Chalk Paint® means that when the paint is applied to a surface which has been oiled or stained, it draws the stain up through the surface and into the paint, causing discolouration. To prevent this you need to create a seal between the oiled/stained/varnished furniture and your paint. You’ll want to use a water-based shellac such as Chalk Paint® Lacquer to seal in the stain.
If you’re painting vintage furniture, check if it’s from the 1930s or ‘40s. Furniture from that period often has an oil-based finish that will create a stain. The same can happen if you’re working with new, untreated pine. As Chalk Paint® adheres to the surface, it will draw out any oil stains or tannins in wood, even if they aren’t visible to the eye.
If you see a stain bleeding through the paint, apply a coat of stain blocker (or knotting solution) directly over the paint you have already applied. Treat the whole affected surface to avoid any patchiness in the final finish. One or two coats of blocker applied evenly with a cloth pad will block the stain. It dries in minutes, and then you can get on with your painting.
These stains can often be pulled through if Chalk Paint® Lacquer is applied on to Chalk Paint®. If this is the case, do the same steps as above but over the Chalk Paint® Lacquer you’ve already applied.
For more detail on this topic please read this page on preparing your surfaces for Chalk Paint®.
Chalk Paint® is not recommended for teak or other oily woods. Always test, if in doubt! For more information on bleed through on floors, watch Annie’s instructional video by clicking here.
Chalk Paint® is also the perfect foil for surface damage to furniture such as coffee rings, water damage, or ink. Simply cover marks, stains and aesthetic damage with a fresh lick of paint.
Touching up or repairing damage
As with any decorating paint, it’s not advisable to paint over small areas that need a touch up – even if you are working with paint from the same batch. When you apply a first coat of paint to a surface, the rate at which the water is absorbed by the surface (‘wicking’) has an effect on the final colour. Subsequent coats will be absorbed by the paint underneath at a different rate, leading to a subtle shade difference in the finish.
For this reason, where repairs are necessary, it’s advised to paint the entire surface of the affected area, whether this is a section of wall (from corner to corner & top to bottom) or the face of a piece of furniture (for example, a drawer front). There is no need to repaint the entire room or the whole piece of furniture! However, to save time, it’s worth testing by touching up just the small area first. If it looks fine, you can seal and leave. If not, apply as above.
Mixing your own Chalk Paint® colour
The colours in the Chalk Paint® range vary from soft and pale to bright and strong. Annie’s carefully selected colour palette is hugely flexible as you can mix colours together to extend the range and create endless possibilities. Most of Annie’s colours do not contain black pigment which can muddy colours when mixing; so you can combine hues without worry of dirtying your final colour.
If you want to make a colour paler, add Old White or Pure.
Find out roughly what ratio you need by experimenting – you could use your fingers to dab and mix colours, or a teaspoon to make small amounts. For larger amounts you could use a cup or even a tin as a measure.
Start with a dollop of your chosen colour, slowly adding the Old White or Pure. A dollop of Provence and two dollops of Old White gives you a ratio of 1 to 2, making a soft pale turquoise. Use Pure and the colour is cleaner and fresher, giving a more vintage 1950’s look.
For lots more information on mixing colours, see Annie’s book ‘Colour Recipes for Painted Furniture and More’, or contact one of her trained Stockists.
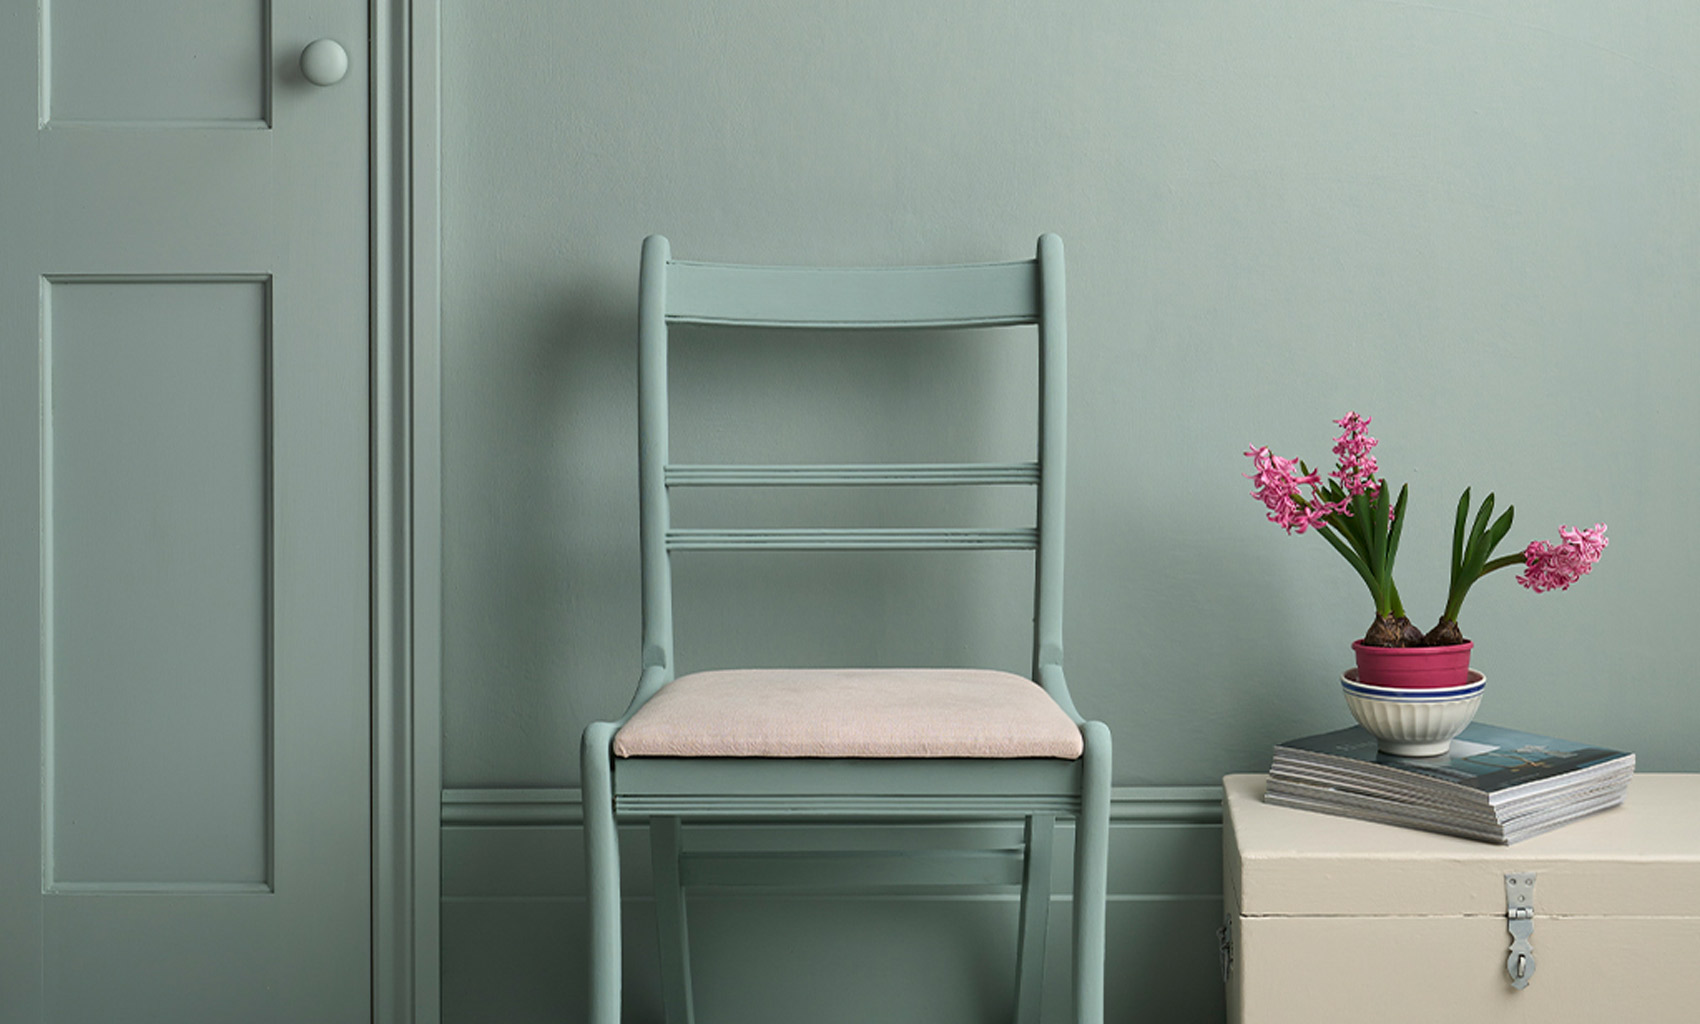
Using Chalk Paint® on walls
Chalk Paint® can be applied to walls. It gives a wonderful texture and matt look. Use a large brush to apply Chalk Paint® to walls. A brush will use less paint than a roller (see Annie and Felix’s experiment here) and will add depth and texture to the final finish. You can then wax the wall or leave it – bedroom walls look great with a soft, matte unwaxed finish.
Using Chalk Paint® on floors
Chalk Paint® can transform old concrete and wooden floors, even if they’re varnished. Just apply two or three coats of Chalk Paint® and finish with Chalk Paint® Lacquer for durability.
Always test the paint and lacquer on a few areas of the floor before you start, to check whether any stains will bleed through. Chalk Paint® Lacquer will often pull stains through that Chalk Paint® doesn’t, so it’s important to test with both.
For more detailed information on painting floors, watch Annie’s instructional video by clicking here.
Using Chalk Paint® on metal
You can paint straight onto all kinds of hardware, including metal work. Chalk Paint® can re-invigorate old brass and other metal fixtures and fittings.
It can even cover and slow down rust. Any rusting areas should be sanded and treated with a rust inhibitor before painting.
Using Chalk Paint® on kitchen cabinets
You can achieve beautiful results using Chalk Paint® on – and in – your cabinets. Ensure they are spotlessly clean without using harsh chemicals before painting. Any residue oils left from kitchen-use will affect the finish. Apply at least two coats of paint, and then two or three coats of Chalk Paint® Wax or Chalk Paint® Lacquer to seal and protect them. Remember to always test your cabinets first with both paint and lacquer.
For more information on painting kitchen cabinets, watch Annie’s instructional video by clicking here.
Using Chalk Paint® on fireplaces, mantelpieces and radiators
Chalk Paint® adheres very well to marble, stone, wood and brick fireplaces with no undercoat required. It can also be used on radiators! Make sure the radiator or fireplace is cold before you start painting in order to prevent the paint from cracking. You can leave the paint unsealed or finish with Clear Chalk Paint® Wax if you wish. Remember to leave the wax to cure for 48 hours before exposing it to heat.
Using Chalk Paint® outdoors
Chalk Paint® even works outdoors! It’s particularly good on brick, concrete, stone and terracotta – and there’s no need to seal if it’s a vertical surface. On horizontal surfaces and garden furniture, use Chalk Paint® Lacquer. Chalk Paint® Lacquer is a hard-wearing, water-based polyacrylic varnish with built-in UV protection and is water-resistant, making it ideal for outdoor use.
Chalk Paint® will fade in the sun and age gracefully with the elements if not finished with Chalk Paint® Lacquer. Chalk Paint® is a water-based decorative paint and does not have any weatherproof or protective properties. Depending on the look you want and the site-specific conditions you may find it needs a fresh coat periodically.
For more information on painting outdoors, see Annie’s tutorial here.
For the 11 dos and donts of painting outside, see Annie’s blog here.
Using Chalk Paint® on tiles
Chalk Paint® will adhere to tiles. It should be sealed with either Chalk Paint® Wax or Lacquer. When using on glazed or shiny tiles, allow for the full curing period (21 days for wax, 14 days for Lacquer) and take care not to scratch or chip the finish during this time.
Bear in mind that this is not a finish that will hold up to being exposed to a lot of water/steam or frequent cleaning with chemical cleaners.
Using Annie Sloan paint as a chalkboard
Although not originally designed for the use of chalkboard, Chalk Paint® has a matt finish and can be written on with chalk.
Using Chalk Paint® in a sprayer
Chalk Paint® can be sprayed, but you will need to experiment to get the right results from your particular model. The most important thing to know is that there is no ‘magic’ ratio of paint to water and you will need to tweak it every time you spray, as each paint colour has a slightly different viscosity.
Firstly, using an airless sprayer is not recommended – the high solids content in Chalk Paint® will damage the nozzle.
Warm paint will spray and settle better – place tin of Chalk Paint® in a bain marie of very hot water for 15 minutes. As a starting point, dilute to just under 20% with clean water then adjust as necessary.
You can also add a paint extender to help get a smooth finish.
For more information on how to apply Chalk Paint® with a spray gun, watch Annie’s instructional video by clicking here, and for applying Chalk Paint® Lacquer with a spray gun, click here.
Archived Chalk Paint® Colours
Gone – but not forgotten.
These are our beautiful, archived Chalk Paint® colours: Lem Lem and Henrietta. These hues have been retired because they were limited edition or because they are less highly in demand than the rest of the Chalk Paint® palette. We are no longer regularly manufacturing these three shades: but we still have the colour recipes for them and they may make reappearances due to popular demand. Contact your local Stockists for advice, guidance, and paint mixing demonstrations, or email us directly on enquiries@anniesloan.com
Do i need to prep before using chalk paint?
Chalk Paint can be applied to almost any surface* without sanding or priming. Annie always advises performing a patch test before getting stuck in with painting. Don’t forget to stir Chalk Paint before use, to ensure a smooth and even colour.
Annie rarely cleans her furniture before painting, and instead just gets stuck right in. However, if you do wish to clean your surface before painting, ensure all excess soap is removed and the area is dry before applying paint. Bear in mind, in some cases, cleaning might activate an old finish which could get in the way of the Chalk Paint. If you do choose to clean your surface, we advise avoiding chemicals and only using warm water.
*Real teak and silicone cannot be painted.
On rare occasions you need to prime before using Chalk Paint:
- Heavily stained and dark oil-stained wood may need priming with clear shellac before painting. Red coloured wood and typical 1930/40s furniture will have sometimes been previously stained – a clear shellac needs to be applied to seal the surface, to prevent yellow or red tones coming through the Chalk Paint.
- If you’re using a shade of white, you may find stains come through the paint. You can patch test first. If required use a sealer such as a clear shellac prior to painting. Alternatively, Annie recommends using our Chalk Paint in Athenian Black underneath any shade of white to block stains.
On rare occasions you need to sand before using Chalk Paint:
- If your surface is highly polished, very lightly sand by hand to create a key so the Chalk Paint adheres.
- Lightly hand sand to create a key if painting over gloss paint.
- When painting over laminate or melamine, sand very lightly by hand to create a key and apply two thin coats of Chalk Paint.
If you are going to sand prior to painting, remember to take suitable health and safety measures such as wearing a dust mask.
Using Chalk Paint® on upholstery and leather
When it comes to painting upholstery, small items which are firmly upholstered (such as a dining chair seat) and made from natural fabric (such as cotton or linen) give the best results. In these cases, Chalk Paint® can be diluted with water and painted on as a ‘wash’ which will stain the fibres. Fabric that is painted in this way does not require to be waxed afterwards. For more information this technique, watch Annie’s instructional video by clicking here.
There are other ways to paint upholstery, but the success of painting any upholstered piece does depend on factors such as the condition, colour and composition of the fabric, how firmly it is upholstered, and the colour you are using (reds are less colourfast).
In most cases, you will see better results where you are going from light to dark than if you are trying to go from dark to light.
If confident, you can experiment with different techniques – applying the paint more thickly will change the composition of the fabric, making it stiffer. This can then be waxed and buffed to create a leather effect. Annie and famed New Zealand YouTube star and television personality Astar created a video on just this, which you can see here.
You can also use Chalk Paint® on leather and vinyl – build up the coverage in thin coats, and then wax to finish. As the leather creases and cracks with age, so will the paint, so bear this in mind on well-worn or cushioned items.
For any project, we would recommend testing in a small area first before you commit to painting the whole piece. As a general rule, we don’t recommend painting very cushioned sofas or suites, or items that get very heavy use. There are no guarantees the paint and colour will hold onto the fabric and once it’s painted there’s no going back.
If you do decide to give this a go, we wouldn’t recommend it as a first Chalk Paint® project. If you’ve never used Chalk Paint® before start with a small piece of furniture so you can get a feel for the paint.
Stencilling on fabric with Chalk Paint®
To stencil fabric with Chalk Paint®, apply with a Sponge Roller. There is no need to dilute the paint.
To keep the image from bleeding around the edges try not to overload your roller with paint. Allow the fabric to dry naturally, then heat seal it by tumble drying or pressing with a hot iron.
To see Annie stencilling fabric, click here.
Dyeing fabric with Chalk Paint®
Dyeing fabric with Chalk Paint® is a great way to completely change its colour. You can control the intensity of the colour by adding more or less water. Linen, cotton, cotton voile and synthetic curtains all work well with this technique. You can also use patterned cottons or linens.
We have found that the deeper pigmented colours work best, such as Aubusson Blue, Scandinavian Pink, Antibes and Florence.
Please note when dyeing fabric with Chalk Paint®, you will never achieve the exact colour of the original paint. Bear this in mind when dying. If you’d like something resembling Antoinette, consider dyeing with Scandinavian Pink. Antibes Green for Lem Lem, Aubusson Blue for Provence, and so on.
For more information on dyeing fabric with Chalk Paint® click here.
Fire Retardant Information
Painting over previously waxed of lacquered surfaces
It’s fine to paint over previously waxed or lacquered surfaces, just ensure the wax or lacquer is fully cured before doing so (these finishes take between 1-2 weeks to cure).
Fire-resistant information for print collection
BACKCOATED FINISH: BS 5852: PART 1 IGNITION SOURCE 0 & 1 (CIGARETTE AND MATCH) NON-FR FINISH: FOR UPHOLSTERY – MUST BE USED WITH A SCHEDULE 3 FIRE RETARDANT BARRIER CONFORMING TO BS 5852: PART 2 SOURCE 5.
Fire-resistant information for tickings
BACKCOATED FINISH: BS 5852: PART 1 IGNITION SOURCE 0 (CIGARETTE) NON-FR FINISH: FOR UPHOLSTERY – MUST BE USED WITH A SCHEDULE 3 FIRE RETARDANT BARRIER CONFORMING TO BS 5852: PART 2 SOURCE 5.
Fire-resistant information for linen union
BACKCOATED FINISH: BS 5852: PART 1 IGNITION SOURCE 1 (MATCH) NON-FR FINISH: FOR UPHOLSTERY – MUST BE USED WITH A SCHEDULE 3 FIRE RETARDANT BARRIER CONFORMING TO BS 5852: PART 2 SOURCE 5.
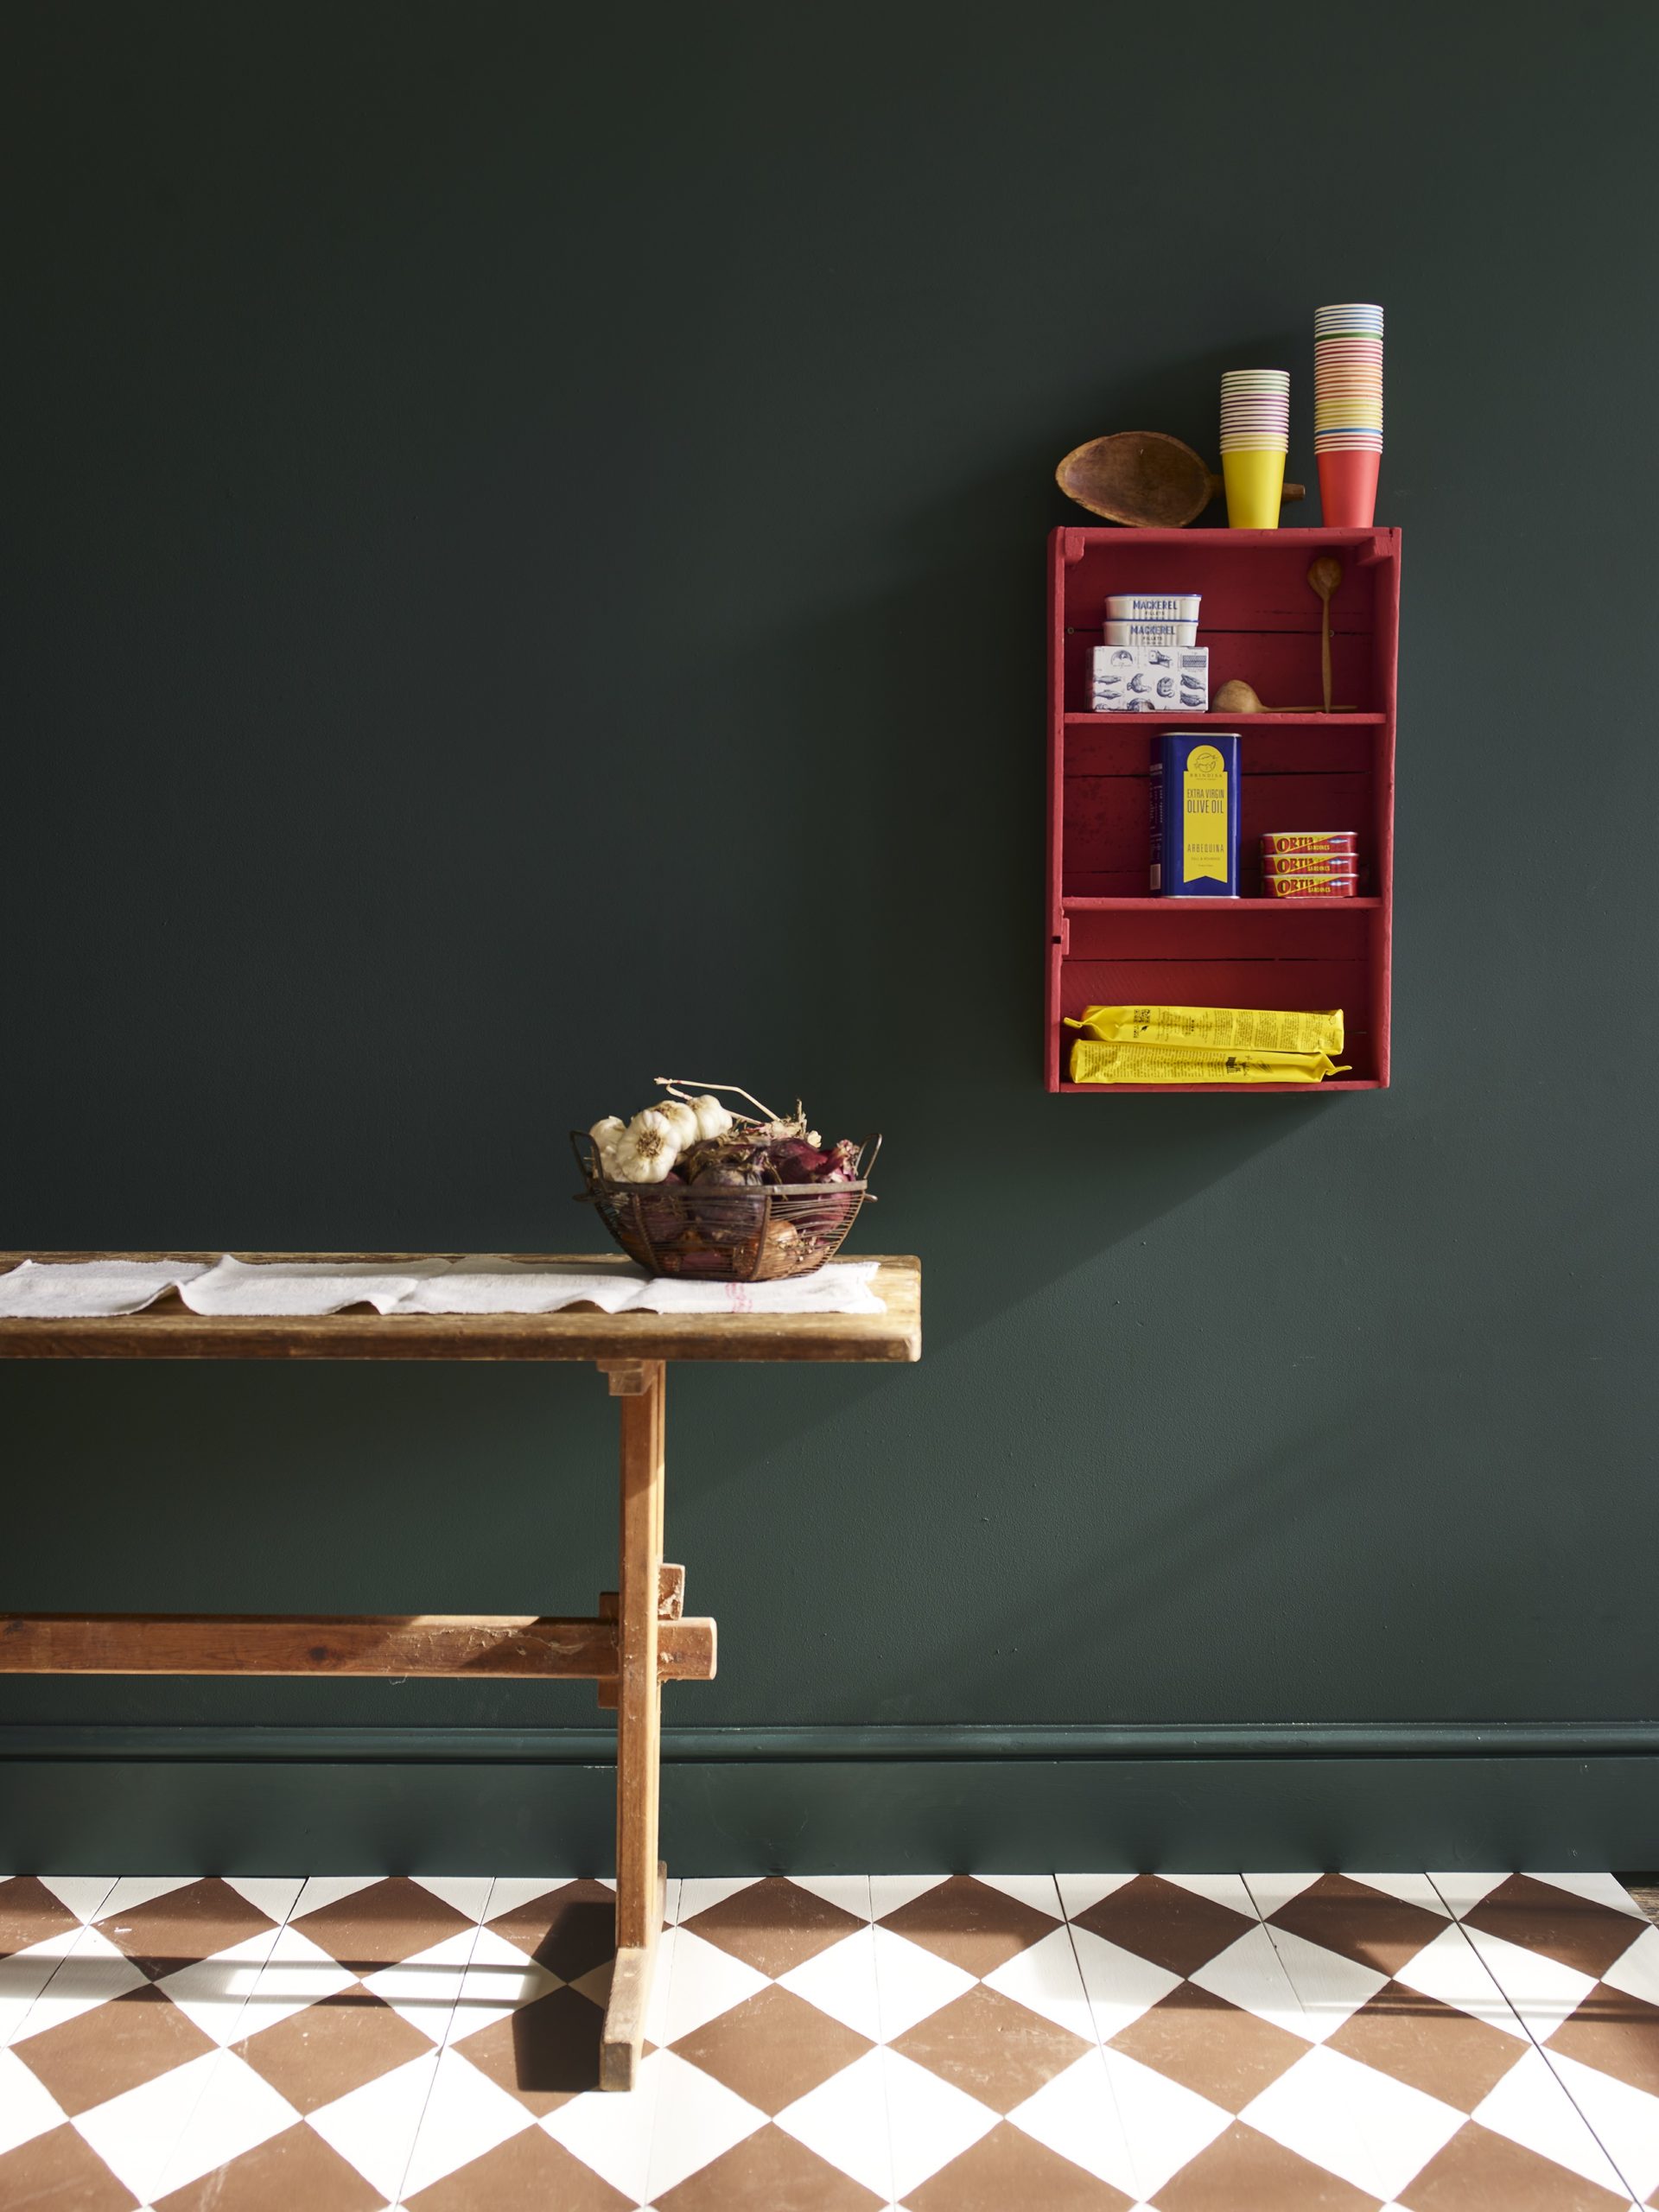
Wall Paint FAQs
Wall Paint
Using Wall Paint on furniture or kitchen cupboards
Wall Paint is an extremely durable finish and could be used on furniture, however it does not offer the same adhesion as Chalk Paint®. We always recommend that you use Chalk Paint® on furniture and save the Wall Paint for what it does best – painting walls!
Using Wall Paint on previously varnished or gloss-painted surfaces
Wall Paint by Annie Sloan can be used on previously varnished or gloss-painted surfaces, but it will not have the same adhesion as Chalk Paint®. To increase durability, an appropriate primer (or a coat of Chalk Paint®) is recommended as a base coat.
Is Wall Paint breathable?
Wall Paint contains ingredients that make it very durable. It doesn’t have the same breathability as Chalk Paint®. If you are painting over lime plaster or other finishes that require a breathable paint, we recommend you use Chalk Paint®.
How much does it cover?
2.5L of Annie Sloan Wall Paint will cover 27.5m2. Coverage will vary depending on the surface and application.
Is it only available in matte/flat?
Annie Sloan Wall Paint is available in one finish: a luxurious, velvety matt emulsion with a slight sheen. This finish gives the best of both worlds in terms of achieving a high-end aesthetic whilst still ensuring the Wall Paint can withstand the demands of a busy family home.
Will it freeze?
Annie Sloan Wall Paint is susceptible to freezing and should be protected from low temperatures. The freezing process will render Wall Paint unusable.
Do I need a mixer?
Annie Sloan Wall Paint can be mixed by hand prior to each use, with no need for a professional mixer. Annie recommends using a mixing stick or the handle of a wooden spoon; just be sure to stir right from the bottom of the tin to distribute the pigments evenly.
Do I need to prime?
Knowing when to prime your walls can save you time, money, and heartache. These rules are useful to help you know when to prime before using Annie Sloan Wall Paint but they’re worth bearing in mind whichever paint you choose for your walls.
A lot of the need for priming can be alleviated by giving your walls a thorough clean before painting. Brush down then wash with warm soapy water or a vinegar and water mix and allow to dry before painting.
As always, Annie recommends performing a patch test before painting to see if any priming will be necessary. Unlike on furniture when multiple small patch tests are sufficient, walls will require a larger patch test as any effects will be less noticeable in small areas. Here’s when you should use a primer:
- New plaster. Painting new plaster can cause visible, uneven brush strokes in the paint finish. To stop brush strokes from appearing on your painted walls you can paint a base using a dedicated primer, or you can create your own “mist coat paint”. Mist coat paint is simply paint which has been diluted with water, which acts as your primer. All you need to do is mix your paint with water: as a rough guide, three parts paint to one part water should work.
- Stained walls. If your walls are heavily stained and thorough cleaning won’t remove marks (for example from nicotine or coffee spills), you should consider priming. This is particularly relevant if you’re using a pale or white shade. Yellow tones underneath will adversely affect the finished colour.
- Gloss paint. A primer should be considered when painting over an especially glossy finish to boost adhesion.
- Drastic colour change. When trying to achieve an extreme colour change such as light to dark, dark to light or painting a bright colour it can be more cost-effective to use an undercoat before applying your Annie Sloan Wall Paint. For example, if you are going from a white wall to a bright colour such as Riad Terracotta you may want to apply an undercoat in a similar colour (or grey) to reduce coats of Annie Sloan Wall Paint required.
Is Annie Sloan Wall Paint durable?
Annie Sloan Wall Paint is highly durable and outperformed competitors in independent tests. It has a washable matt finish. Simply allow a minimum of 14 days to cure before washing.
Is Annie Sloan Wall Paint eco-friendly?
Annie Sloan Wall Paint is a water -based paint containing low VOCs, made by a company who put environmentalism at the heart of every decision we make. Low VOCs mean there are less unpleasant toxins in our paints which is better for everyone. Annie Sloan Wall Paint is also certified as Toy Safe meaning the paint has been tested for toxic heavy metals which can be harmful to you and your family’s health. And, of course, our tins are recyclable! We’re constantly working to be a more sustainable company and we’d welcome your feedback on how we can improve.
How to avoid and clean marks on dark coloured Wall Paints
Annie Sloan Wall Paint is a hardwearing, durable, wipe-clean Wall Paint with inbuilt protective qualities. You may notice after touching or rubbing dried painted walls with unclean hands that the darker colours have a white, chalky quality where your hands have been. This is a characteristic of matt paints made with darker pigments and is easily fixable. Simply wipe with a damp or dry cloth to remove. Do not wipe walls where Annie Sloan Wall Paint has not yet fully dried and cured.
Brush FAQs
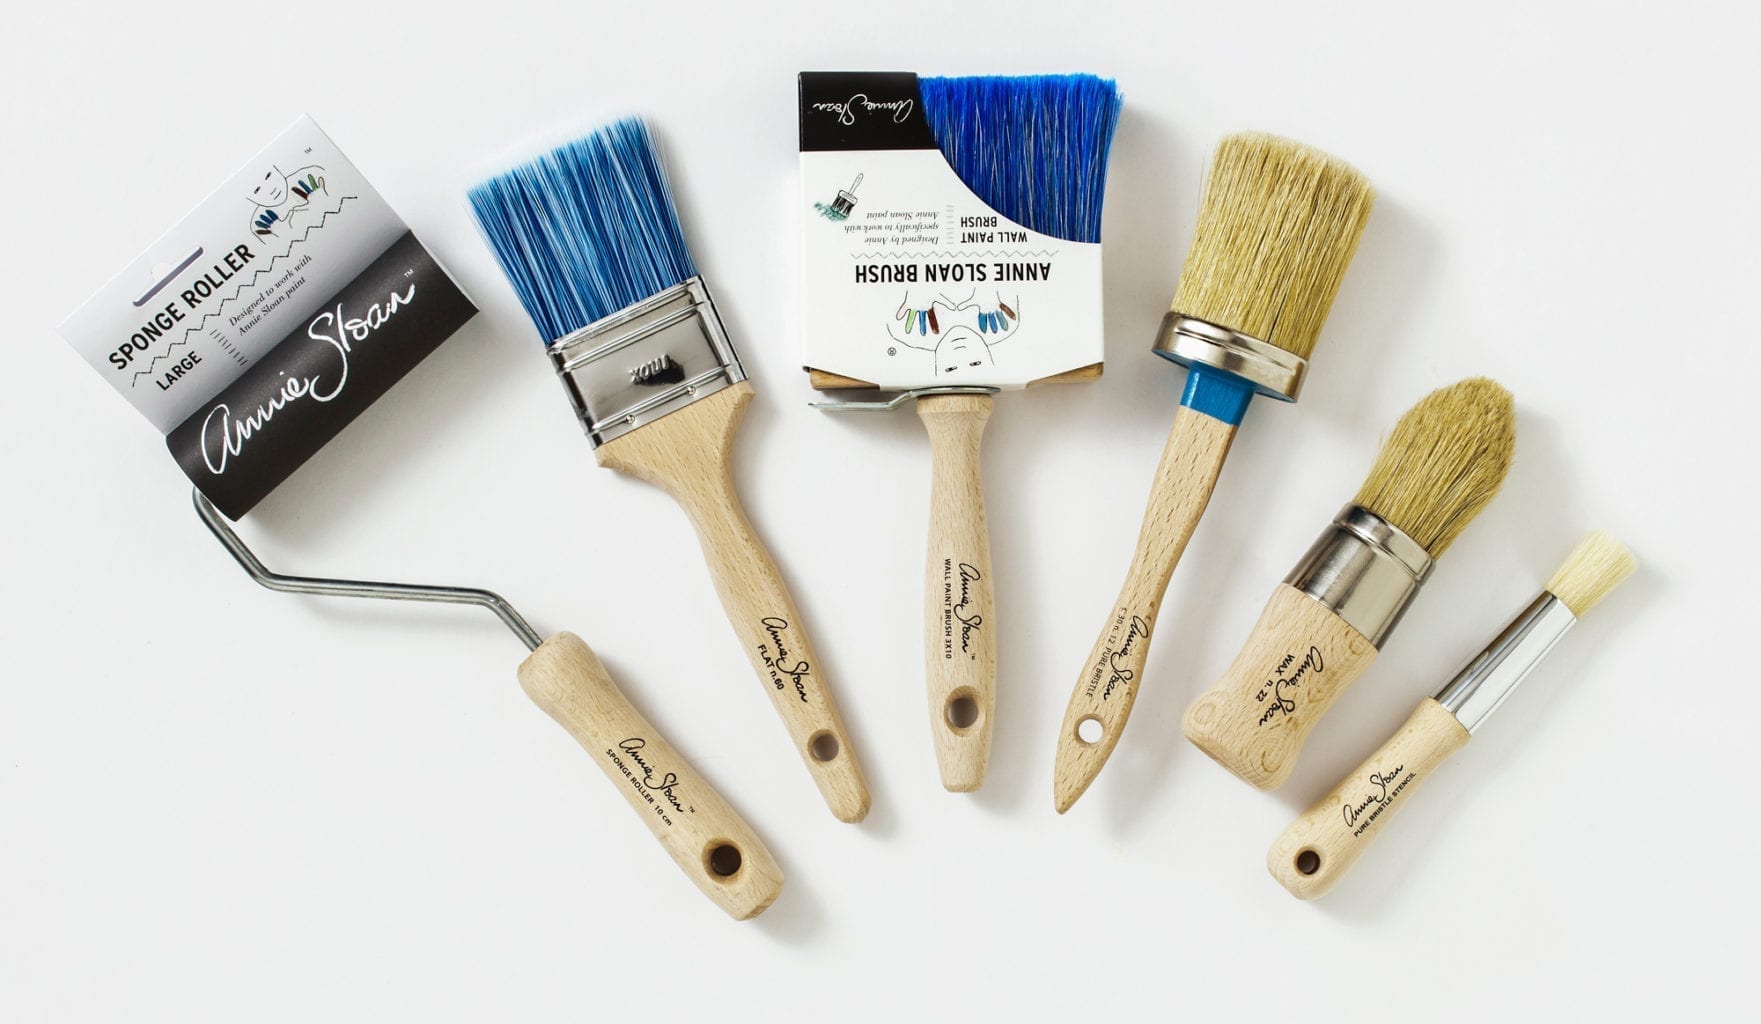
Brushes & Tools
Caring for Annie Sloan Brushes
After painting with Chalk Paint®, squeeze out as much excess paint from your brush as you can, then wash your Chalk Paint® Brush well with warm water to rinse out all the colour. Hang to dry with the bristles pointing downwards to avoid rust and glue deterioration.
Whether you apply Chalk Paint® Wax with a Chalk Paint® Wax Brush or Chalk Paint® Brush, simply wash your brush with warm water and grease-cutting soap to clean it. Harsh detergents may shorten the life of your natural bristle brushes.
Satin Paint FAQs
Satin Paint
What is Satin Paint and what are its advantages?
Annie Sloan Satin Paint is an interior paint from Annie Sloan. It contains a subtle satin-like sheen in the finish of the paint. Not only does this lustre guarantee a chic, contemporary, and classic finish to your painted pieces; it also makes this formula extra hard-wearing and durable. These qualities make Annie Sloan Satin Paint the perfect choice for painting skirting boards, kitchen cabinets, bannisters, millwork, radiators, internal doors and beyond. Annie Sloan Satin Paint can be used on any wooden or metal surfaces indoors. It can also be used for furniture painting, without the need to Wax or Lacquer. For outdoor projects, flooring, and to paint decorative effects we recommend Chalk Paint.
What should I use Satin Paint on?
Annie Sloan Satin Paint should only be used inside, on wooden or metal surfaces. We especially recommend Annie Sloan Satin Paint on skirting, doors, and kitchen cabinets. It can also be used to give a sleek and modern look to furniture painting. Annie Sloan Satin Paint makes upcycling even easier!
How should I use Satin Paint?
Only use Annie Sloan Satin Paint inside and on metallic or wooden furniture for best results. Thoroughly clean surfaces prior to painting and read our Technical Information sheet for best guidance. All surfaces must be clean, dry, and free from any dust, debris or oil-based contaminants before using Annie Sloan Satin Paint. We advise using a water-based detergent such as sugar soap to thoroughly clean.
Do you need to use primer with Annie Sloan Satin Paint?
We recommend simply sanding the area before painting. However, if it is not practical to sand down to remove any sheen, an adhesion primer will help your paint adhere to the surface. If you are painting kitchen cabinets, we recommend doing both.
Is Satin Paint hard to maintain and is it long-lasting?
Annie Sloan Satin Paint is extremely hard wearing, long-lasting, and durable. The satin-like qualities in the finish makes it harder to scratch than other paints, and if scratches do occur, they will be less visible thanks to the sheen. Annie Sloan Satin Paint will be touch dry within hours but will not be cured to complete strength for around 14 days. The full curing time of 14 days should be observed before cleaning your newly painted finish. After this time, paintwork can be washed with a mild soap solution and soft cloth. If extra protection is required apply Chalk Paint Lacquer by Annie Sloan.
What is the difference between Satin Paint and gloss, eggshell or silk paint?
The difference between satin, gloss and eggshell paints is sheen. Annie Sloan Satin Paint has a 10% sheen. Gloss paint has a higher sheen than satin which means that it has a higher reflective level, commonly twice as high as satin. A gloss surface reflects more light which means it will highlight flaws more than a satin finish. If you’d like your Annie Sloan Satin Paint to look more glossy, apply a coat of Gloss Chalk Paint Lacquer. Eggshell paints have a more matt finish, to emulate this apply a coat of Matt Chalk Paint Lacquer over Annie Sloan Satin Paint. Silk and satin both refer to paints with around 10% sheen; commonly “silk” is used for wall paints and “satin” for wood paints.
Is Satin Paint washable?
Annie Sloan Satin Paint will be touch dry within a few hours but will not be cured to provide maximum protection for around 14 days. Do not clean your new paintwork before 14 days have passed. After this time, paintwork can be washed with a mild soap solution and soft cloth.
What is the best type of paint for trim, baseboards and doors?
Annie Sloan Satin Paint is the best wood paint for your skirting, bannister, trims, baseboards and doors. This is because it offers durability and longlife straight from the tin, with no need to Wax or Lacquer. For this reason, Annie Sloan Satin Paint is also perfectly suited to use on kitchen cabinets.
Is Annie Sloan Satin Paint different than regular paint?
Our trim sees more wear and tear than other parts of the home and requires a paint with a sturdy, long-lasting, reliable finish. That’s why Annie Sloan Satin Paint is formulated to be durable enough for these hard-working areas.
What’s the difference between Annie Sloan Satin Paint and matt paint?
The difference between satin and matt paint is sheen (also sometimes known as lustre). Sheen is achieved by light reflecting particles in the paint mix, and as well as looking elegant the finish is typically more hardwearing than eggshell or matt paints.
Do I need to prep before using Annie Sloan Satin Paint?
Satin Paint is ideal for interior wood and metal including interior doors, skirting boards, bannisters, radiators and window sills.
Annie rarely cleans her surfaces before painting, and instead just gets stuck in right away. However, if you do wish to clean your surface before painting, ensure all excess soap is removed before applying paint. Bear in mind, in some cases, cleaning might activate an old finish which could get in the way of the Satin Paint. If you do choose to clean your piece, avoid chemicals and only use warm water.
- You rarely need to sand before applying Satin Paint. However, if you are painting over a highly polished surface, or a surface previously painted with gloss paint, you may wish to lightly hand sand to create a key.
- Heavily stained and dark oil-stained wood may need priming with shellac before painting. Red coloured wood and typical 1930/40s furniture will have sometimes been previously stained – a clear shellac needs to be applied to seal the surface, to prevent yellow or red tones coming through the Satin Paint.
If you are going to sand prior to painting, remember to take suitable heath and after measures such as wearing a dust mask.
Please note: real teak cannot be painted.
Decorative Paint FAQs
Decorative Paints
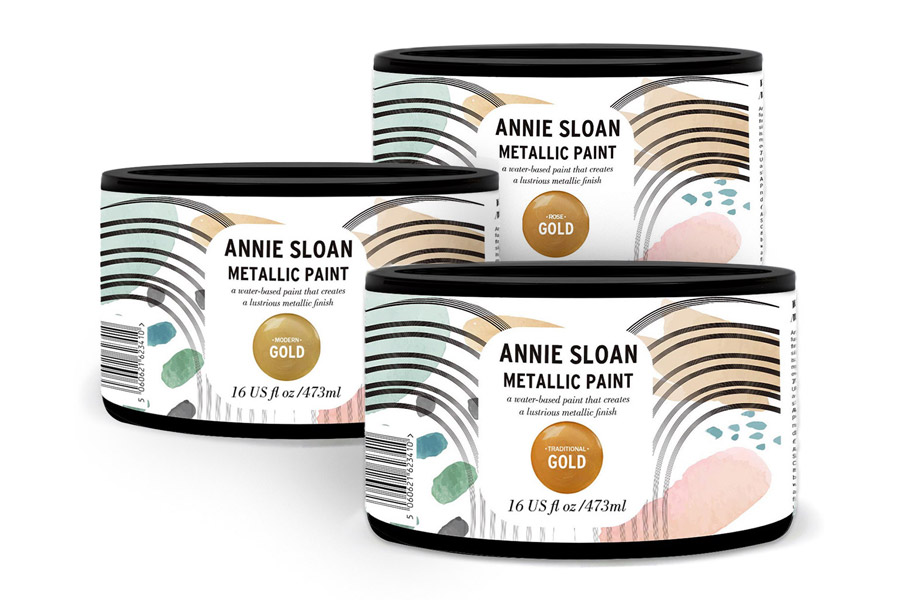
How to use Metallic Paints?
Annie Sloan Metallic Paints can be applied directly to furniture and walls, over Chalk Paint, Annie Sloan Wall Paint or Annie Sloan Satin Paint.
Do I need to apply Wax or Laquer after using Annie Sloan Mettalic Paints?
Annie Sloan Metallic Paints have inbuilt durability so when applying to furniture and on facing surfaces there is no need to apply a finishing protective product. However, if you are using in a high-traffic environment (for instance, on furniture handles, base boards, or in a commercial setting) you may wish to extend the longevity of the finish and ensure peak protection by applying a coat of Annie Sloan Gloss Chalk Paint Lacquer.
Can I use Annie Sloan Metallic Paints outdoors?
No, Annie Sloan Metallic Paints are not designed for outdoor usage.
Decoupage FAQs

Decoupage
What is Decoupage?
Decoupage is a French word that refers to the practice of decorating objects with paper cutouts. Influenced by a crafting tradition that includes the paper cutting of the ancient Chinese, the felt appliqués found in parts of the world as disparate as Siberian and Mexican, and the Polish folk art of paper cutting, decoupage has a rich history. The first evidence of Decoupage as the art of applying paper to furniture comes from France during the 17th Century. Its long-lived, global, popularity is testament to how straightforward and easy the art of decoupage is and how effectively it can bring some statement beauty to your furniture.
What do you need for Decoupage?
When decoupaging you’ll need some Image Medium, which is the glue-cum-varnish hybrid that will adhere Decoupage Paper to your furniture and protect it for years to come. You’ll also want a flat brush to apply the glue (choose something with smooth, flat bristles rather than the tightly packed, full-headed Chalk Paint® Brush which is designed to hold lots of paint to give texture. You’ll be making washing up unnecessarily hard!). We think Decoupage looks best on painted furniture in matching or complementary shades of Chalk Paint®, explore the range of colours here.
What can you Decoupage?
We recommend only using Decoupage inside. We’ve decoupaged walls, furniture and stair risers, to tremendous effect with stunning results. Decoupage will apply best over Chalk Paint or unpainted wood. Some especially cheap, smooth plastics may be resistant to decoupage. Your best bet is always to trial the Image Medium on a small, discrete area of the surface you want to decoupage to see if it holds. You can see some of our projects here on our Inspiration Page.
How to use Decoupage?
Recommended tools:
• Decoupage Papers
• 1 x Image Medium
• 1 x Small Flat Brush
• 1 x Small Chalk Paint Wax Brush
• Clear Chalk Paint Wax or Lacquer
• Scissors
- Consider the background colour of the decoupage paper before you apply and if desired use Chalk Paint® to match and blend with the design.
- Whether painted or unpainted, ensure your surface is dry and clean.
- Apply an even coat of Image Medium onto the surface, using a Small Flat Brush. This acts as an adhesive to stick the decoupage paper to any surface.
- Lay the decoupage paper on the surface, press gently from the point where you first laid the paper towards the opposite side, smoothing out any creases.
- After allowing at least 30 minutes for the Image Medium to dry, apply a coat of Image Medium over the top of the decoupage paper to seal.
- Once dry apply either a coat of Clear Chalk Paint Wax or Lacquer to finish. On high traffic areas, use two coats of Gloss Chalk Paint Lacquer for maximum protection.
Annie Sloan’s Decoupage tips
- Familiarise yourself with this technique on a test area as tissue paper is delicate to handle.
- Wet paper can stretch and wrinkle, but this should reduce when dry. For a soft edge, tear rather than cut with scissors from the decoupage paper.
Trade FAQs
Trade Programme
Is there a minimum order amount when purchasing for trade?
In the UK & Europe, there is no minimum order requirement. However, in the US, a minimum order of $100 applies.
What do I need to qualify as trade?
You’ll need to be a registered business and be able to prove this with a valid tax ID or company reg number. If you don’t have these, we will still consider your application if you can provide sources such as a company website or social media channels.
Use of cookies
AnnieSloan.com uses cookies to improve your experience when you browse the site.