If you love the Shabby Chic look but don’t know where to start, this is the guide for you. We’ll take you through everything you need to know to paint your furniture in classic Shabby Chic style. With a little Chalk Paint™ and some sanding know-how, you’ll be able to create this elegant, worn look in no time.
What is Shabby Chic?
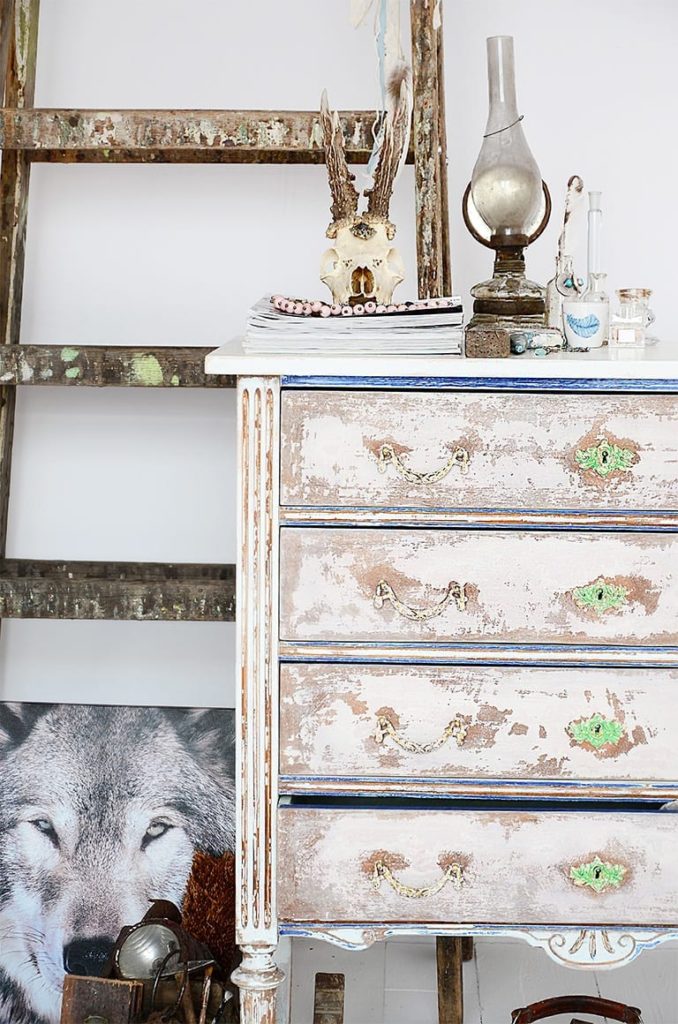
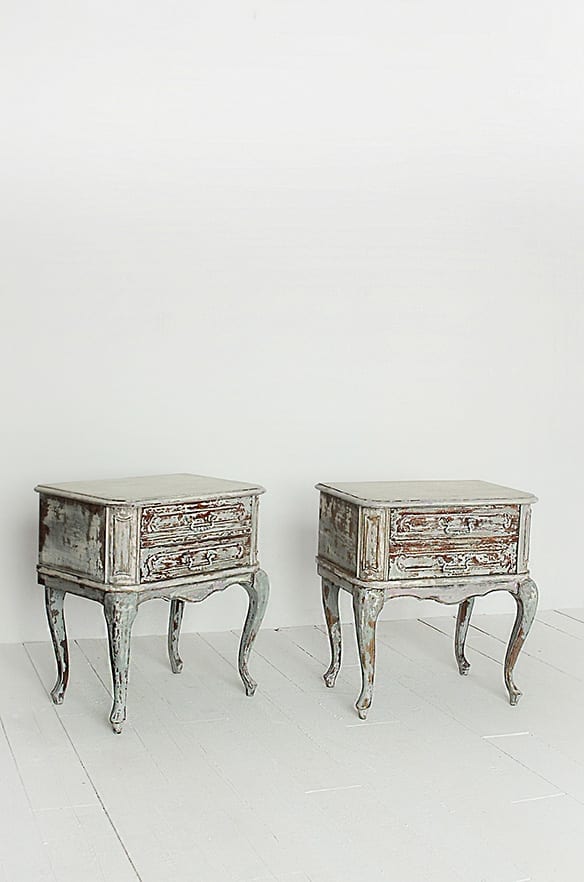
Shabby Chic is a style that conjures up images of faded elegance, soft vintage linens and pretty florals. Colours are often pale pastel or white – think Old White or Cream. Nothing looks new here: this is not the home of flat-pack, out-of-the-box furniture. Rather, everything from the basement to the attic looks lived in and loved.
But what do you do if your furniture is too shiny and new for the Shabby Chic look? This is where Chalk Paint™ steps in. This brand of paint was specifically developed by Annie Sloan to create a range of different effects, including ageing. It’s your fast-track to creating an antique look, adding character and depth to furniture in minutes (rather than years).
Shabby Chic furniture paint – what to use?
Shabby Chic furniture is chipped and worn, showing signs of wear and tear. Paint is distressed to create the appearance of history. There are several different methods for creating this look.
You might look at using a traditional milk paint, which is great for a chippy effect, but gives no control over how the paint cracks and distresses as it develops. Other paints require surface prep like washing, sanding and priming before you can get started. They also take up to 24 hours to dry.
The beauty with Chalk Paint™, the brand of paint developed by Annie Sloan, is that it gives you complete control over how chipped and worn you want your finished piece to look. It will go evenly onto most surfaces and then it’s up to you to decide exactly where and how much you want to sand back to reveal the surface below. Chalk Paint™ also dries in minutes rather than hours, so you have the satisfaction of being able to finish your project in a conveniently short space of time.
What other materials do I need?
You don’t need much equipment to create the Shabby Chic look on furniture. All you really need is Chalk Paint™ in the colour of your choice, some sandpaper and Chalk Paint™ Wax to seal in your finish once you’ve finished.
Materials for the ultimate Shabby Chic finish:
- Chalk Paint™
- Chalk Paint™ Brush
- Clear Chalk Paint™ Wax
- Dark Chalk Paint™ Wax (optional)
- Chalk Paint™ Wax Brush (optional)
- Sanding pads
- Blowdryer (optional)
- Clean, lint-free rags
How to paint furniture Shabby Chic
With creating a Shabby Chic look, the magic happens once you start sanding. Chalk Paint™ will go on beautifully and evenly on most surfaces. What sanding will do is allow you to start distressing the paint. On most projects, we wax first and then sand, but here we want to sand first in order to maximise the distressed effect.
Use coarse sandpaper to sand right back to the original surface or even knock some of the paint off to chip it. For an authentic aged effect, focus on areas that will naturally see wear and tear – such as hardware that will be touched frequently or edges that would get knocked over the years.
*Top tip* the thicker Chalk Paint™ is when applied, the more it will crack and chip during the sanding process.
7 Simple steps to DIY Shabby Chic furniture painting
- Before you apply Chalk Paint™ you want to make sure the paint is really thick. The thicker it is, the more it will crack and chip once you start distressing it. To do this, leave your can of paint open overnight or in the fridge for a couple of hours.
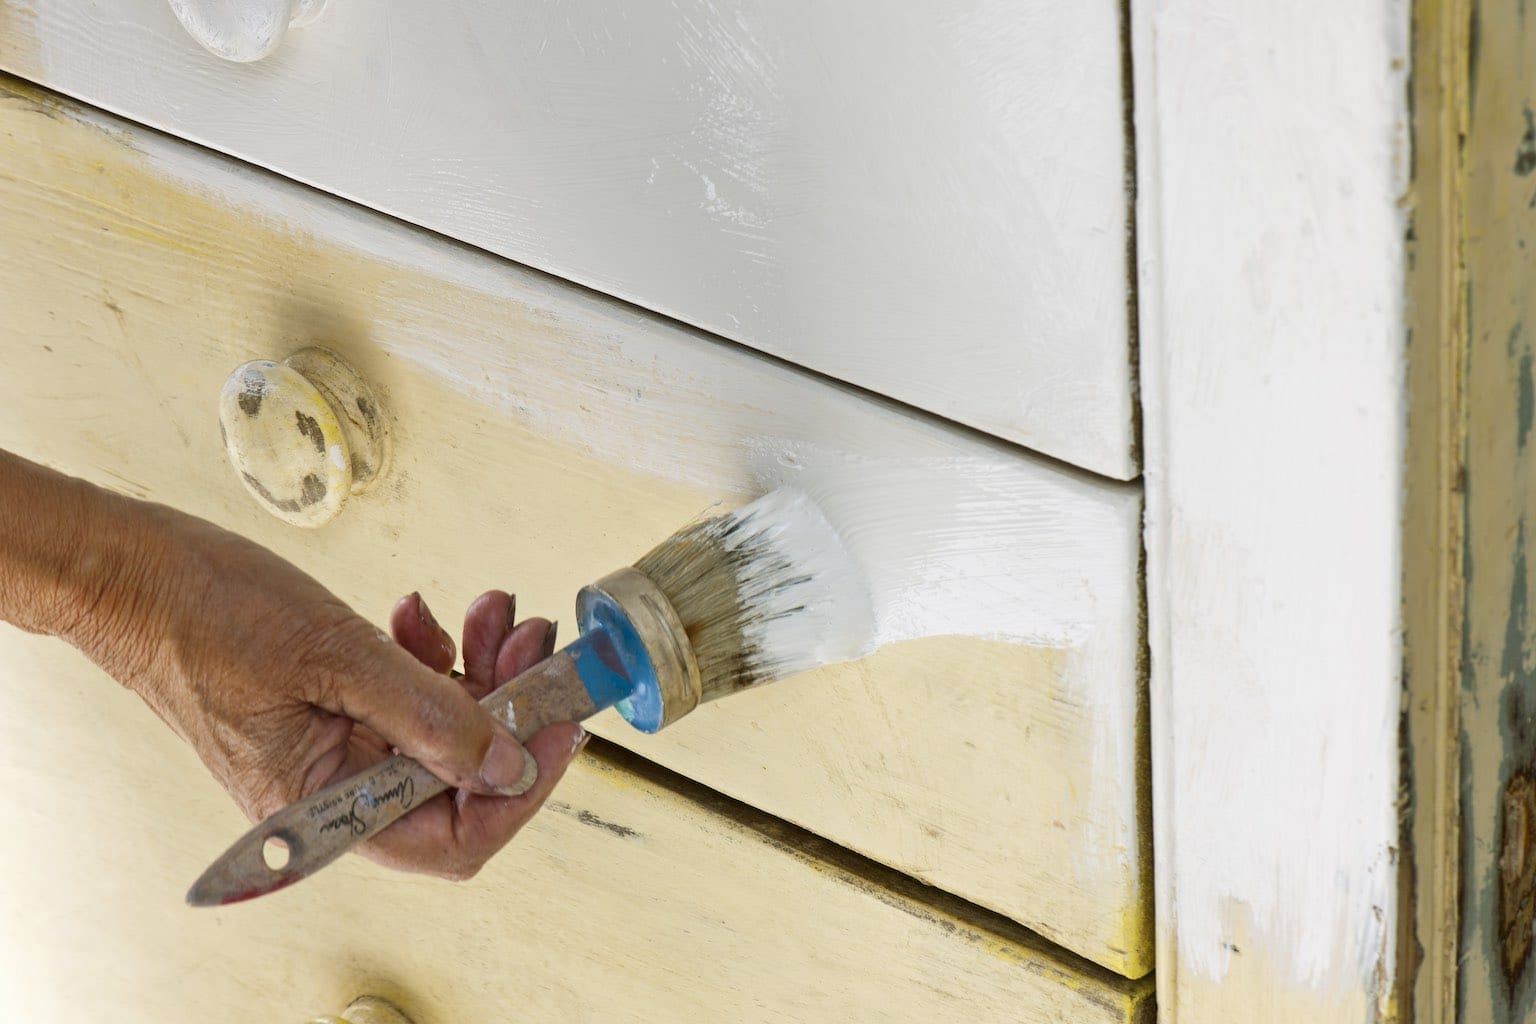
- Apply a liberal coat of Chalk Paint™ with a large Chalk Paint™ Brush. Move the brush in every direction to create lots of texture. You want to apply the paint especially thickly wherever you want to create some cracking or chipping later.
- *Optional* To create cracks in the paint, use a hairdryer. Hold it close to the paint to warm it up at first and then move it away as the cracks start to appear after a minute or so.
- Once the paint is dry, use a coarse sanding pad or sandpaper to chip paint off and sand back to reveal the wood beneath.
- As soon as you’re happy with the level of distressing you’ve achieved, it’s time to wax. Use a coat of Clear Chalk Paint™ Wax to seal in your paint, smoothing it over with a Chalk Paint™ Wax Brush.
- *Optional* To really bring out the cracks, apply Dark Chalk Paint™ Wax, really pushing it into the brush marks for an authentic aged finish.
- Use a lint-free cloth to gently wipe off any excess wax and leave to dry. The wax will be touch dry quite quickly but can take up to two weeks to fully harden so be gentle it until then.
Getting started with Shabby Chic furniture painting
The appeal of the Shabby Chic look is that your painted furniture needn’t look perfect. If you make mistakes while you paint or sand your piece, there’s no need to worry. Ultimately, what you’re trying to achieve is an uneven patina and the appearance of something that has faded and worn over the years. If something has been knocking around for decades, moved from house to house and handed down through generations, it won’t exactly be in mint condition anymore. Your aim is to replicate that effect simply with a liberal lick of Chalk Paint™.
Now you know how to paint your furniture in Shabby Chic style, make sure you support your local Annie Sloan Stockist by buying the materials you need through them. If you try out this technique yourself, we’d love to see how you get on! Share your project with the Annie Sloan community online by using #AnnieSloan.