Techniques

How to: Gild with Transfer Leaf for a Modern Look

Hello, I’m Annie Sloan and welcome to my studio! So I’ve got these, four of these chairs, I think they are really, really lovely. They’re quite a modern design, the upholstery is a bit old-fashioned, so I’m going to update these chairs, change the upholstery, paint the legs and gild the back.

So this is one of four chairs, this one I’ve covered in one of my fabrics, I’ve painted this in Athenian Black and then I’ve waxed it. And now I’m about to do something here [points to backrest]. So what I’ve done is I’ve painted it Athenian black and then I’ve sanded it so it’s really really smooth. So it looks a bit dusty at the moment, but that’s just because of the way it’s been sanded and then I’m going to start the gilding process. [Removes seat pad] So I’m going to take that away.

So these are the materials you’ll need for gilding. You’ll need some metal leaf, you’ll need some Gold Size and you’ll need a brush – a nice flat brush. So here we have transfer. Transfer leaf comes on like a thin tissue, it’s stuck on there. And you’ve got a larger margin on one side so it’s really easy to hold. That’s my aluminium one (or silver as you might call it). There’s a copper one, that’s it there, a nice red-y copper. And the one I’m going to use today, which is brass. So that’s it there. So I’ll work out how many sheets I’ll need, probably… you’ll need quite a few: sort of one, two, three, four, five, six. Always make certain you’ve got enough before you start.

[Places chair on its side] I’m going put this down now. As I said I’ve already sanded it so it’s very very fine. There are no marks because anything that is underneath there will show through. So now I’m going to open this up [opens pot of Gold Size], and dip my brush in… and I’m going to put my glasses on as well!

So as I said, I’ll need about six sheets for here. Each book has 25 sheets in it, so long as you’ve got enough that’s fine. Now I’ve sanded it really, really well I want to get rid of as many marks underneath, make it as smooth as possible. And then I’m going to start painting my Size on. It will absorb well into this because it’s Chalk Paint™. I don’t want too many brush marks and I don’t want to over brush. So that now is drying so you don’t want to work back into that too much. So this is quite a large area to do. I haven’t been very consistent I haven’t been very methodical but that’s okay. I’ve just seen some bits I missed. It’s quite difficult to work because it absorbs in very quickly and I don’t want too many brush marks on it. And beware of getting little bubbles.

Now you’ll see that some areas are quite clear, some are a little bit blue-purpley colour, some are white and as we’re talking it’s changing. I’ve got to wait until it’s all gone completely clear, if there’s any areas which are white – wait. If you put the leaf onto this now where it’s white it won’t stick properly. While that’s waiting you need to put your brush into some water. So now we just wait for that to dry.

[Fifteen minutes later…]

So now I think it’s dry. Have a look around and it’s pretty dry. Now you’ll notice that it went through various stages; it went from white, to sort of purplish and then to completely clear. That is now sticky, so if I put my finger on there, it’s not wet it just slightly sticks to my finger. Don’t do that too much, you’ll take it off. Generally I would love to leave this like a few days and that really hardens up and then it’s fantastic to use, but you can do it right away. So I’m going to do it right away.

[Picks up brass leaf] So I’m going to take a piece, I’m going to hold it by the edge. I’m right-handed so I’m going to use my left hand to hold it, and my right hand to guide it with my brush and the best thing to do is not to hurry it and find yourself a good position. You mustn’t be scared of it, it’s very strong! So I’m going to start just by putting it down. Once I put it down I can’t really take it off again. And now I’m going to brush it with my brush, making certain it’s all completely flat all over. Making certain about the edges in particular.

So all the edges, you can see they’re coming off as well slightly there, that’s all good. It’s just it’s coming off on its own. So that comes off and it’s all pretty flat. I’m going to keep flattening it. Now I’m not getting the size on my brush so I’m just going to go to the edge there. And then these bits will just fall off. Be careful that you don’t get them onto here – you don’t want little bits.

Now we go for the next piece, and I’m going to overlap it slightly. You don’t have to butt it together, you just overlap it. It doesn’t have to be straight. I think there’s something very rewarding about doing this. So take that off, and you’ll see there – it only sticks to where you’ve got size underneath it. And now I’m going to just rub that away. So there now, you can barely see that there’s a line. So I’m going to continue this.

So you do waste a little bit but that can be pulled off and used on other bits, I usually keep those. And we’re nearly there. Why I’ve used transfer on this is because I can easily handle it. If I was to pick this up and try to put it onto there it’s likely that it might go a bit messy, and I want to keep the square look as much as I can. Now this one, because it’s quite a large bit there I’ll just cut that. So that’s remained sticking on there.

Now I’m going to brush right over, getting rid of all the excess, it can look pretty messy at one point, and you think it’s all a disaster but actually it’s all good. So, I’ll take it up… So that’s that! Now at the moment it’s very shiny because it’s brass, so I’ve got to finish it with something. I could finish it with wax, or I could finish it with lacquer. I much prefer to finish it with wax because the wax will sort of slightly dull it which is exactly what gold looks like.

So I’m going to use Clear Wax on here. I could use one of these Wax Brushes which would be really fine, just be careful that you don’t scratch the gold, or the brass rather, so you’d have to do it so that you get a good bit of wax on there, and it’s covering well. You might find a cloth is better especially for something small. So you can see it’s dulled it, and it’ll bring out some of that squareness as well. I’ll just show you. It’s flattened at all. Don’t rub too hard. If you rub really hard and we’re going to remove it, especially as this is quite freshly put on. If it would have been dried a little bit longer, it will be firmer but that’s all good.

The reason I’m waxing it is not only to give it a really good gold look, but it’s also because brass tarnishes. And over time it will start to go sort of darker browny colour, and it can even start to discolour in quite ugly ways, or sometimes quite beautiful, but I would definitely do this to make certain it stays this colour. I’m not going to rub too hard.

So that’s it! The chair is done, a modern gilded look. I’ve got another chair and I’m going to do that very slightly differently, so watch out for that one!

Create this chic modern look using Chalk Paint™, Gold Size and a Metal Transfer Leaf of your choice.

Gilding with metal transfer leaf might seem daunting at first, but once you get started, you’ll see how fun and satisfying it can be. In this step-by-step guide, you’ll learn everything you need to know to gild with confidence. Whatever metal you choose, transfer leaf can be easier to handle than loose leaf and is great for larger surfaces – we’ve used it to gild whole doors and even walls at Annie Sloan HQ!

You don’t need much in your toolkit to get started – the metal transfer leaf of your choice, some Gold Size and a paint brush. The secret is in the prep – before you gild, you’ll want to make sure the surface you’re working on is perfectly smooth. If you’re lacking in confidence, practice on a smooth surface that won’t be seen or used first. Finally, once your masterpiece is complete, remember to seal your work in with either Clear Chalk Paint Wax™ or Lacquer so it will last for years to come.

Step by step guide to using metal transfer leaf

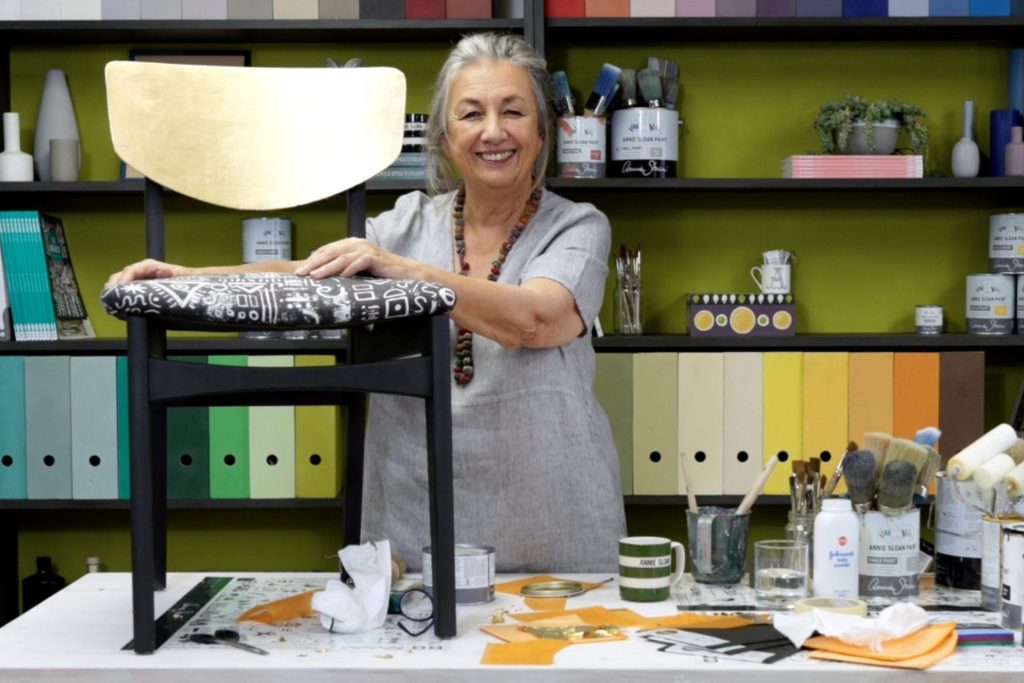
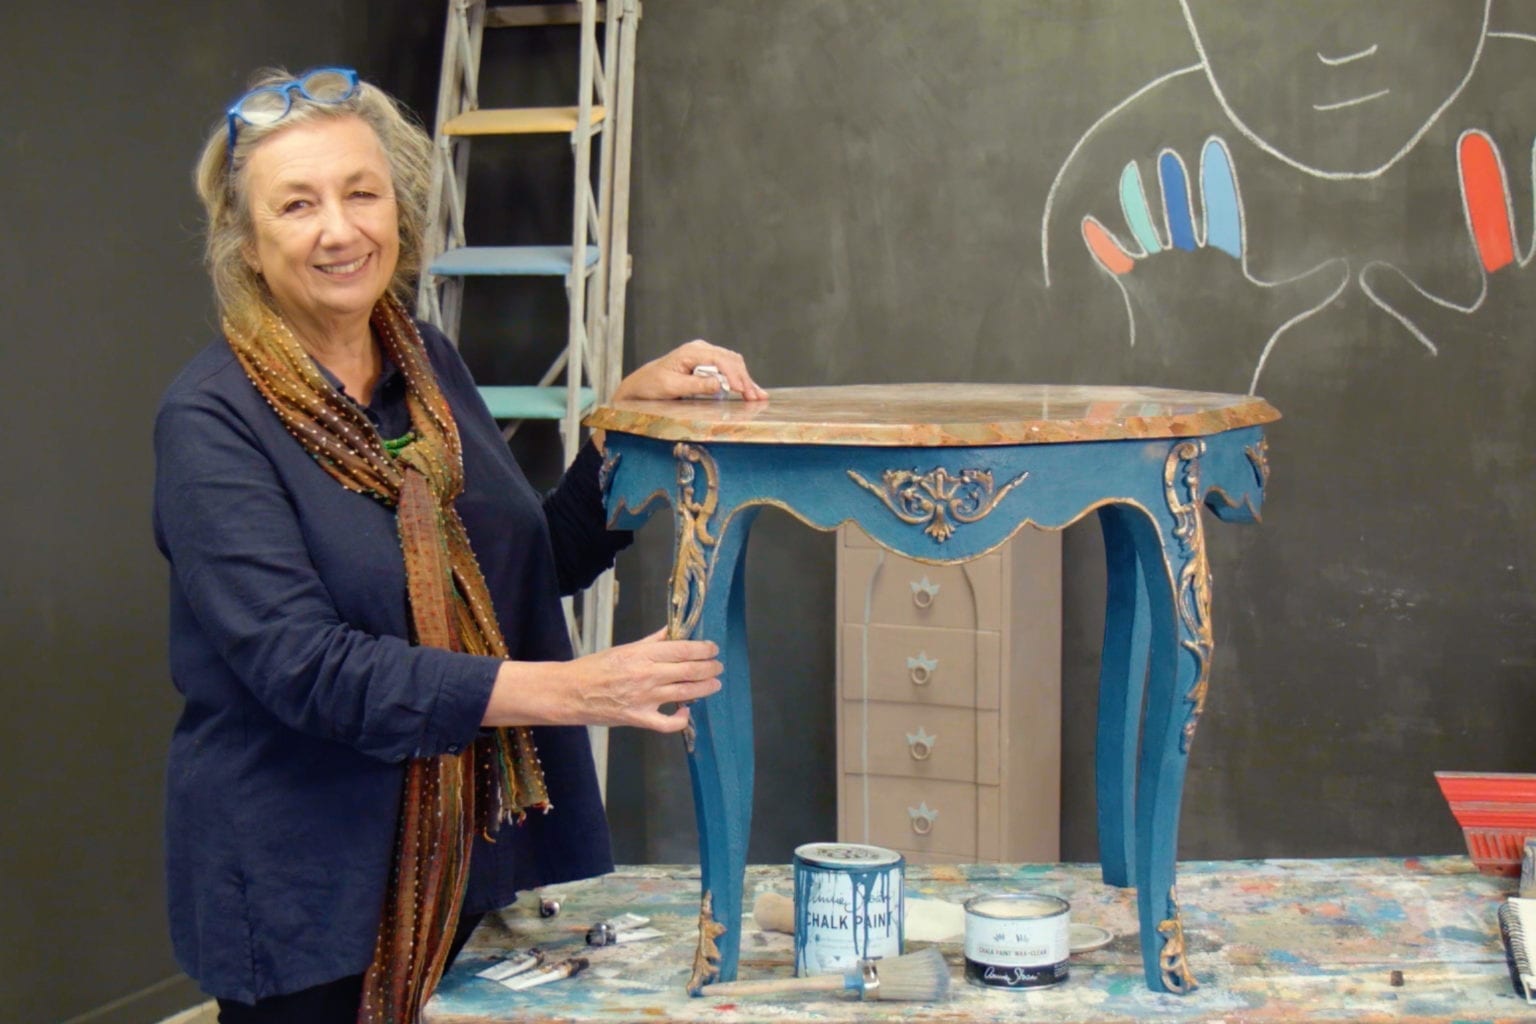
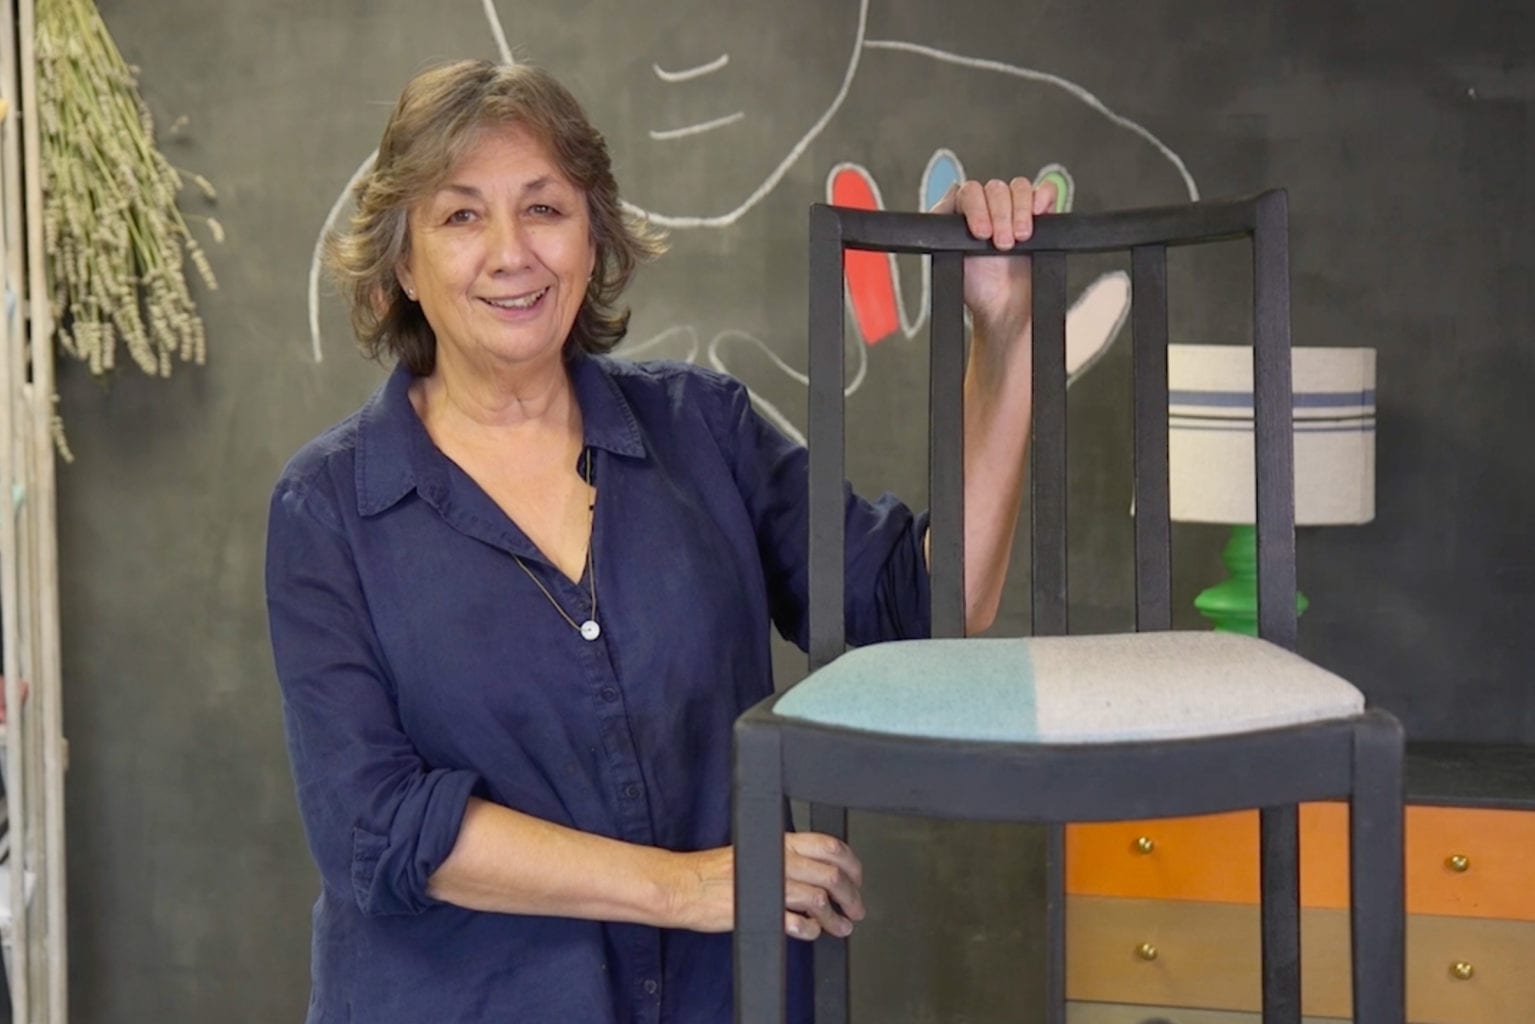
  1. Whatever surface you’re gilding; ensure it is completely smooth. Any imperfections and marks beneath the metal leaf will be more prominent once gilded. In this tutorial, Annie has painted her chair with Chalk Paint™ in Athenian Black and sanded it back for a smooth effect and maximum modern style.
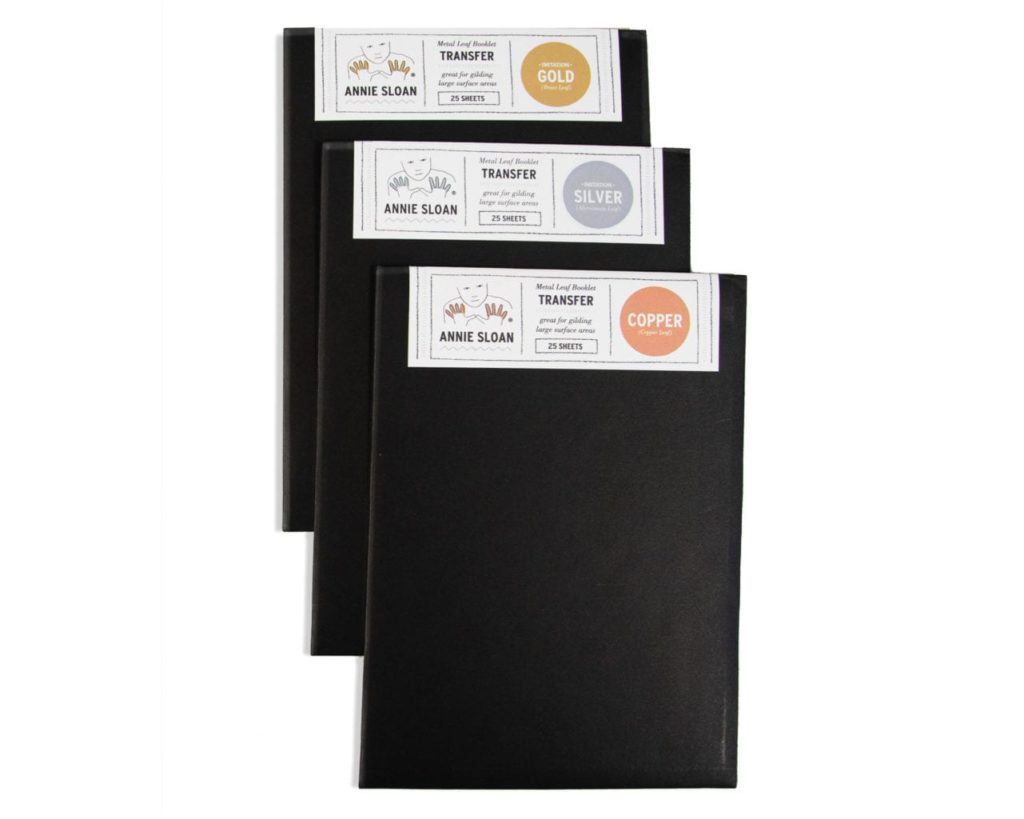
  2. Before applying Gold Size, ensure you have enough metal leaf to cover the area you plan to gild. Each pack of Annie Sloan Metal Leaf (Loose or Transfer) contains 25 sheets. For this modern gilded look, Annie is using Imitation Gold Transfer Leaf.
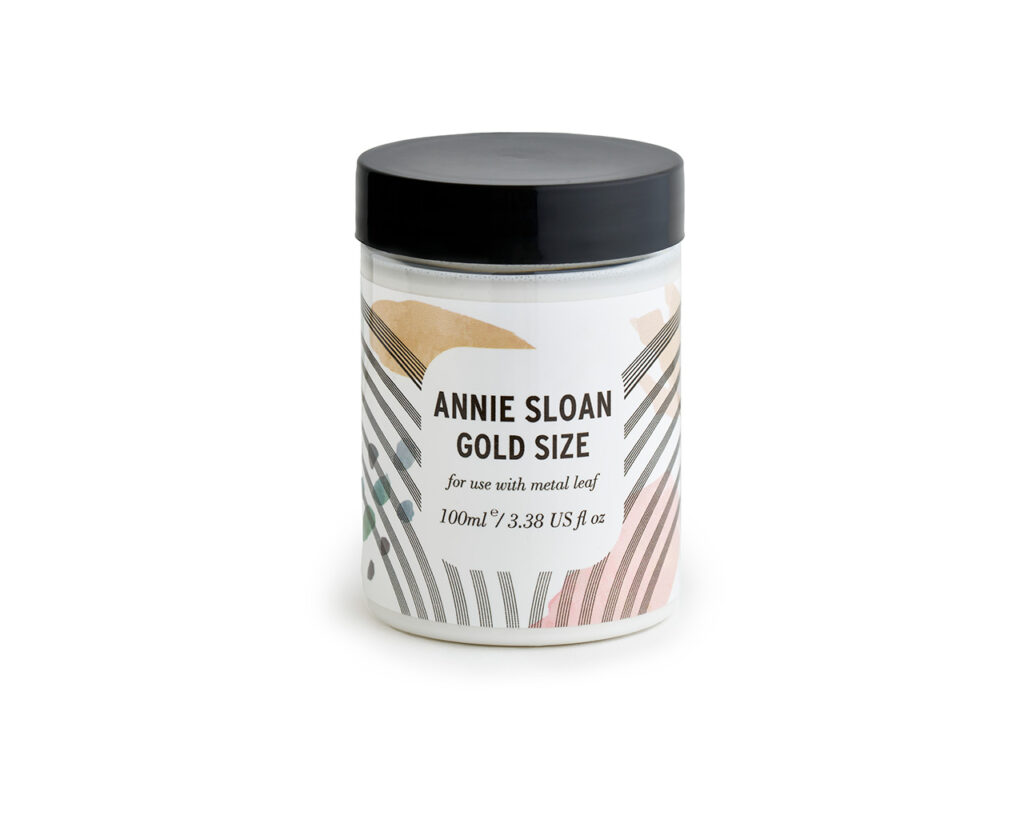
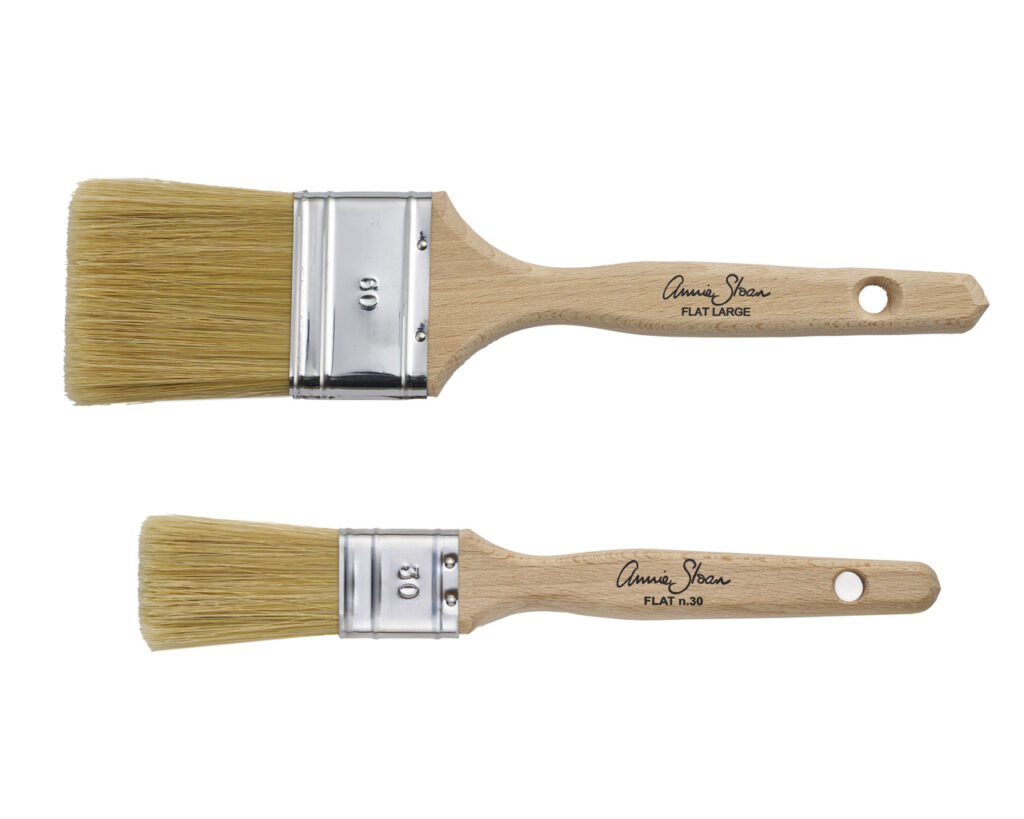
  3. Use a Small Flat Brush to apply Gold Size to the area you wish to gild. Size is an old English word for glue, so “Gold Size” literally means “a glue for gold”.
  4. Apply the size consistently: be careful with the amount you use as too much size will take longer to dry and could cause slipping when you apply your leaf. Make sure not to overbrush (over brushing is repeatedly brushing the same area; it can lead to balling and pilling of gold size and Chalk Paint™) and remember to brush away any drips from the edges of your piece. Clean brushes immediately after use.
  5. Once applied, the size will first appear white, then purplish-blue, then finally clear. Wait for the size to be completely clear (around 10-15 minutes; depending on the climate and size of the area) before applying your Transfer Leaf. This is when the size is stickiest. If there’s any white or blue patches the leaf will not adhere properly. Once dried clear, the size will be sticky to touch, and will remain so for weeks on end. You can apply metal leaf immediately or for as long as the size is sticky.
  6. Take a sheet of Transfer Leaf and hold it by the wide tissue margin for ease, being careful not to touch the metal itself. Gently lay the metal side face down onto the size. Once this is placed it can’t be moved, so take your time.
  7. Take a clean, dry brush (here Annie is using a Small Flat Brush) and lightly brush the back of the sheet. Ensure you focus on the edges as this is where the leaf would be most likely to peel, but don’t let your brush touch the size. Keep brushing and applying light pressure until the tissue paper comes away from the metal leaf.
  8. Continue to brush the metal surface to fully flatten it with light pressure. Brush any loose bits of metal away making sure they don’t stick to rest of the size. Any large bits can be kept for future projects.
  9. Take your next sheet and overlap it slightly with the other.
  10. Repeat step 8 and continue until your whole area is gilded. Remove any excess leaf with a clean, dry brush.
  11. Once finished, you need to seal the Transfer Leaf. Both brass (Imitation Gold) and copper will tarnish, so sealing these with Clear Chalk Paint™ Wax or Lacquer is essential or they may dis-colour over time. Aluminium (Imitation Silver) does not tarnish but it’s still advisable to seal with either wax or lacquer to prolong your finish. Both Chalk Paint™ Wax and Lacquer will also slightly dull the shine of the metals, mimicking the look of authentic gold and silver.
  12. Apply Chalk Paint™ Wax with either a brush or lint-free cloth, removing any excess with a lint-free cloth also. Alternatively, apply Chalk Paint™ Lacquer with a brush and wash immediately after use.
  13. Finished! A modern gilded look.

So there you have it. Everything you need to know to gild with transfer leaf like a pro. Whether you’re planning on gilding the back of a chair like Annie or going for an even larger piece of furniture, this guide should have you creating a modern gilded look you can be proud of.

Ready to start? Remember to support local by buying your gilding materials through your local Annie Sloan Stockist. When you’re done, take a picture of your finished project and share it with the Annie Sloan community using #AnnieSloan.

Shop

Featured Products

Annie Sloan with a modern gilded chair in Chalk Paint® in Athenian Black and Transfer Gold Leaf, Tacit in Graphite
Transfer Metal Leaf Booklets in Brass (Gold Imitation), Aluminium (Silver Imitation) and Copper by Annie Sloan

Transfer Metal Leaf Booklets

Shop Product
Annie Sloan Gold Size 100ml pot

Gold Size

Shop Product
Annie Sloan Paint Swatch Athenian Black

Athenian Black

Shop Product

Clear Chalk Paint™ Wax

Shop Product

Dark Chalk Paint™ Wax

Shop Product
Annie Sloan Small and Large Flat Brushes with synthetic bristles

Flat Brushes

Shop Product

Related Videos

Shop

Browse

Chalk Paint

About
Shop