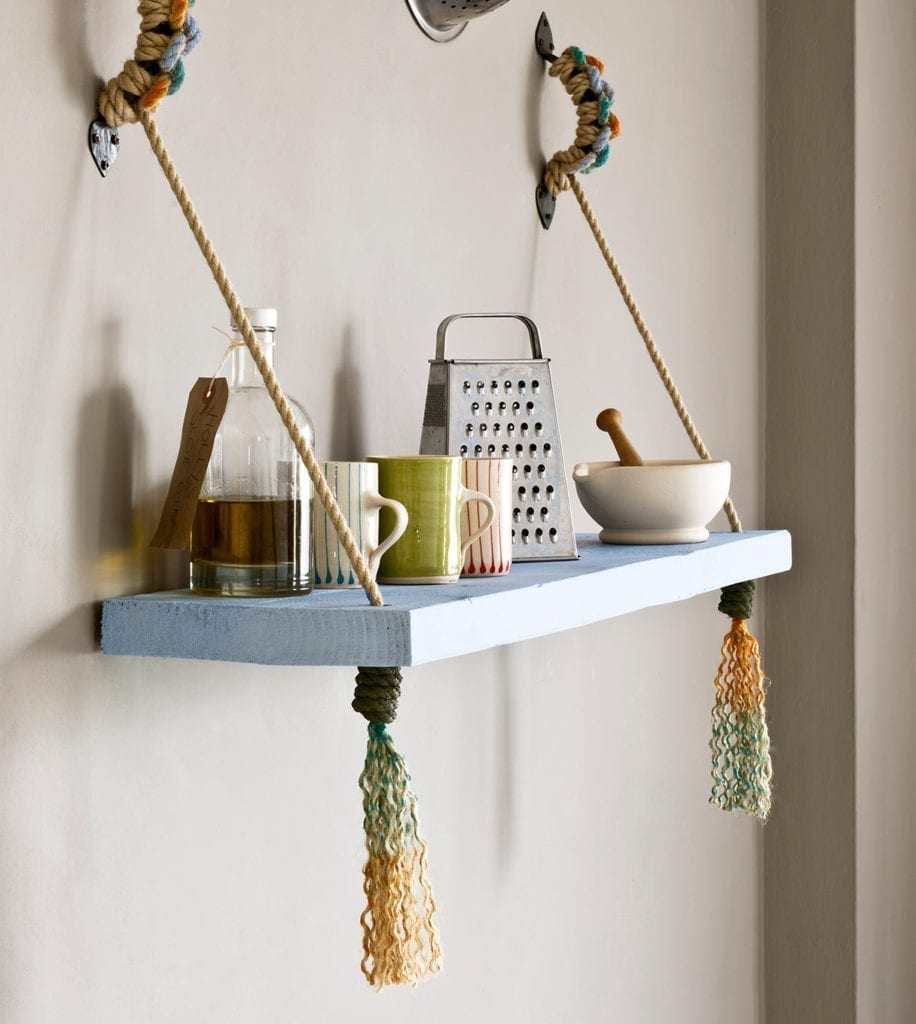
This is a lovely technique to learn if you love the look of rope shelves. Perhaps you want open shelving in your kitchen or somewhere to display your favourite home accessories in your living room. You can follow these steps using a new or an old scaffold plank. But if you don’t have one handy, a chunky wooden board will do.
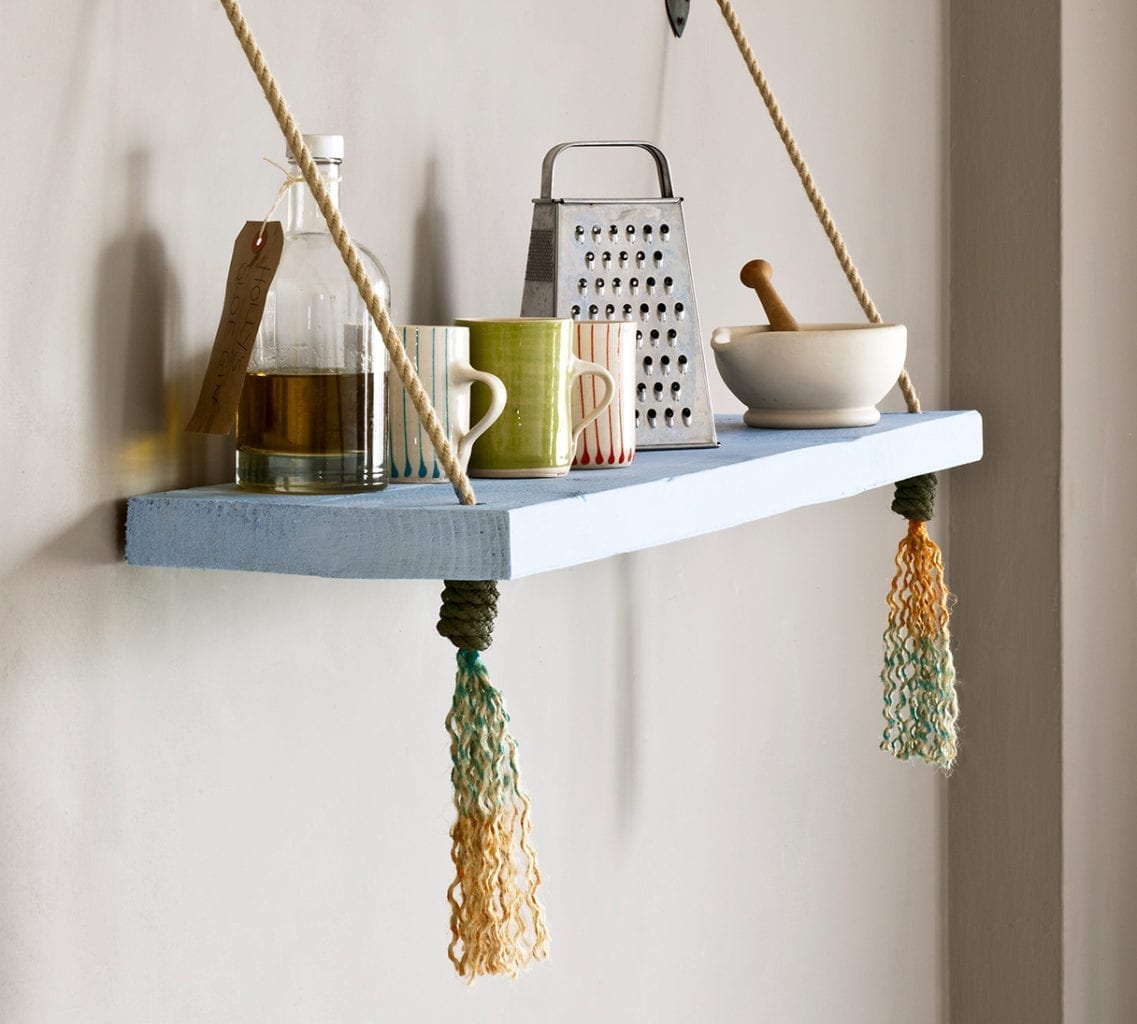
What really elevate this look is the way the rope itself is painted in Chalk Paint® and frayed. This serves to add colour and a decorative flourish to an otherwise minimalist shelf design.
Step by step guide to making a rope shelf
- You’ll need some natural-looking 3-strand polyester rope – at least 3 metres for each side. If you can’t get hold of a new or old scaffold plank, a chunky wooden board will do. Cut the board 100cm in length. Paint the board with Chalk Paint® in the colour of your choice.
- Drill a hole at both ends of the front, 4cm from the front edge, with a 10ml drill bit.
- Screw two standard door hinges on the back of the plank, 3cm from the outside edge at both ends. These will be hidden.
- Cut your rope into two lengths and make a stopper knot in each. You need more rope than you might think for this knot, so measure approximately two feet from the end.
- Hold the rope between your index finger and thumb, take it around the tip of your index finger then go backwards over the rope towards the hand and turn five times.
- With your other hand slide the rope coil off your finger and with your other hand insert the short end back through all the loops.
- Insert the short ends through the coil.
- Gently pull both ends and work the coil as tight and evenly as possible.
- Decide on the length of your ‘tail’ and dab on Chalk Paint®. You can use more than one colour if you wish. Watering the paint down a little will help it go on.
- Now cut the end – you want the tail to unravel and fray.
- Place your wooden plank against wall and use a spirit level to make it level. Open the hinges out, mark and attach the plank to the wall. Use appropriate fixing for the wall – use a wood screw for a timber wall or wall plug/screw anchor with masonry drill for cement.
- Once the shelf is horizontal and held in place, pull your rope up through the holes you made, using your knots as stoppers.
- To find the best position and angle for the handles that will hold your shelf horizontally, place the rope against the wall under tension and mark with a pencil. This mark gives you the bottom position of the handle.
- Screw your handles to the wall.
- Wrap the handles with the rope in a series of reversed half hitches. These knots can also be painted in Chalk Paint® for a bit more colour and interest.
- Pull everything tight and decide where you want to cut the rope at the top.
- Wrap some tape – any tape – two times around the rope and then cut with a knife through the centre.
- Seal the end with the tape still in place using a lighter. As it’s molten plastic the end of the rope will be extremely hot so do not touch until cool, then remove the tape. The end will now be sealed and won’t unravel.
This painted rope shelf is featured in Annie Sloan Paints Everything published by CICO Books 2016. See the book to discover how the shelf and rope were painted in Chalk Paint®. Photography by Christopher Drake © CICO Books.