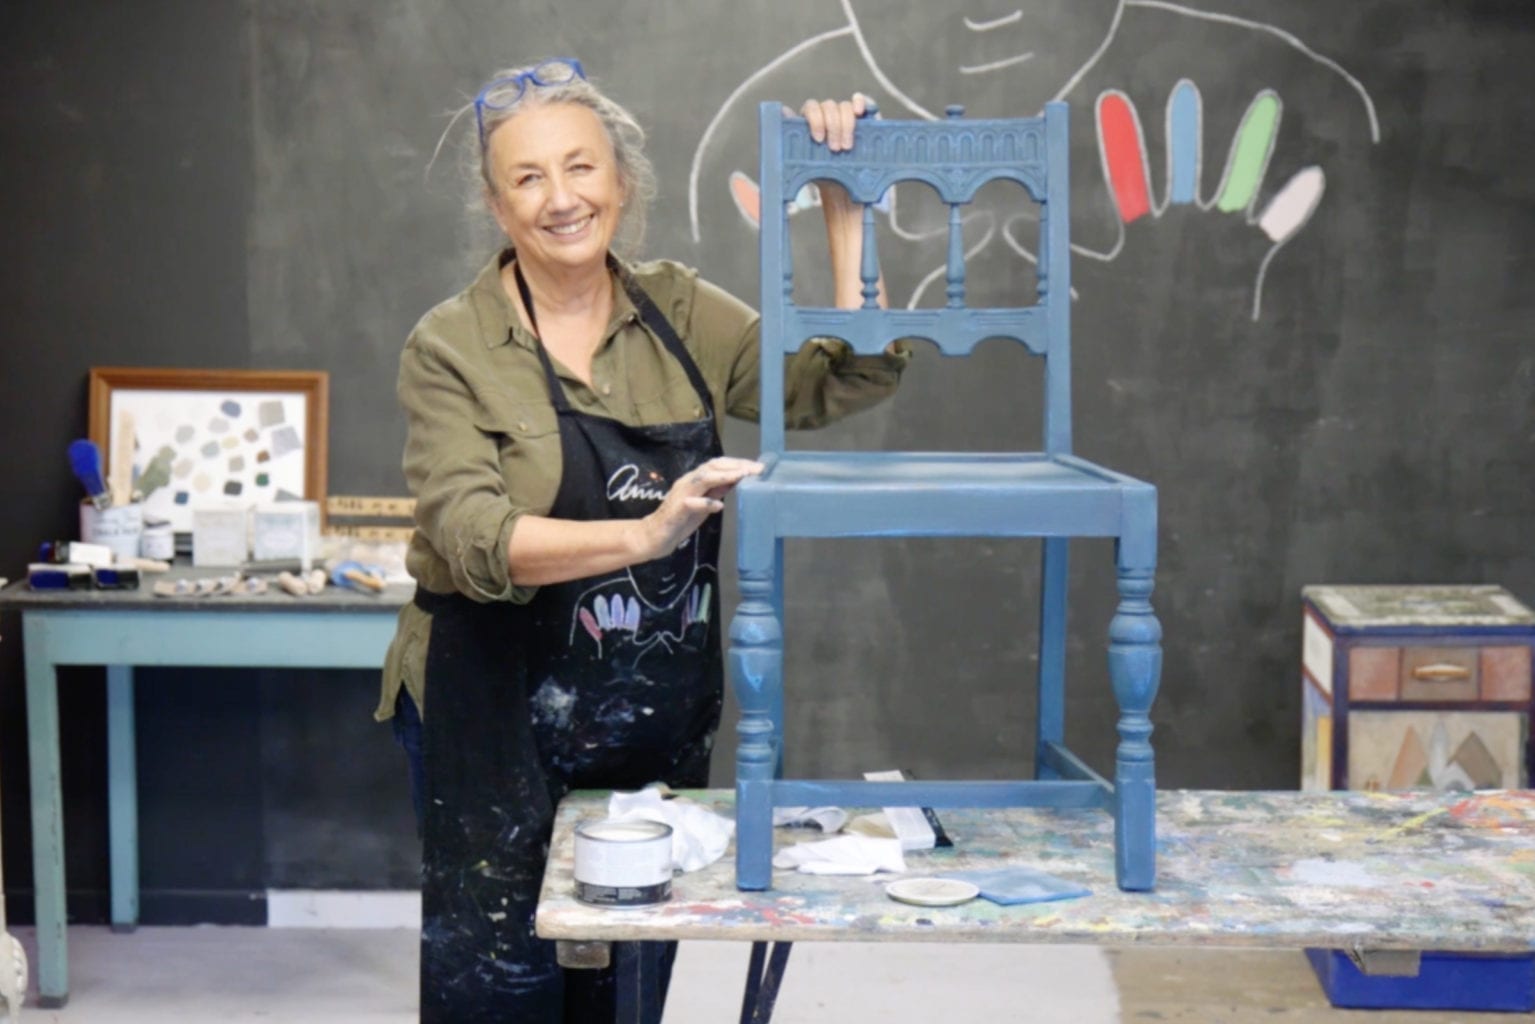
- Pomaluj mebel farbą Chalk Paint™ w wybranym kolorze. Annie zastosowała tutaj Old White. Przy pomocy pędzla Chalk Paint™ nakładaj farbę w różnych kierunkach, aby uzyskać fakturowane wykończenie (pomoże to uzyskać efekt postarzenia).
- Po wyschnięciu nałóż drugą warstwę farby, dbając o to, aby pomalować każdy fragment mebla.
- Pozostaw farbę do wyschnięcia, a następnie przy pomocy pędzla do wosku Chalk Paint™ Wax Brush nałóż warstwę bezbarwnego wosku Chalk Paint™ Wax.
- Przy pomocy bezpyłowej ściereczki usuń nadmiar wosku.
- Gdy bezbarwny wosk jest jeszcze mokry, przy pomocy pędzla do wosku Chalk Paint™ nałóż ciemny wosk Chalk Paint™ Wax. Nanoś go kolejno na małe obszary. Nakładaj go obficie – będzie wydawał się bardzo ciemny, ale nie martw się, gdyż będzie można to zredukować.
- *WSKAZÓWKA: Jeśli bezbarwny wosk wyschnie przed naniesieniem ciemnego wosku, zawsze można nałożyć większą jego ilość.
- Przy pomocy czystej ściereczki bezpyłowej zetrzyj ciemny wosk. Możesz zetrzeć tyle, ile chcesz, w zależności od efektu, jaki chcesz osiągnąć. Ciemny wosk powinien ładnie pokrywać ślady pędzla stworzone podczas malowania. Jeśli chcesz usunąć jeszcze więcej ciemnego wosku, można do tego celu zastosować bezbarwny wosk Chalk Paint™ Wax, który działa jak gumka.
- Na koniec, po wyschnięciu ciemnego wosku, pokryj cały mebel co najmniej jedną warstwą bezbarwnego wosku, aby zabezpieczyć wykończenie.
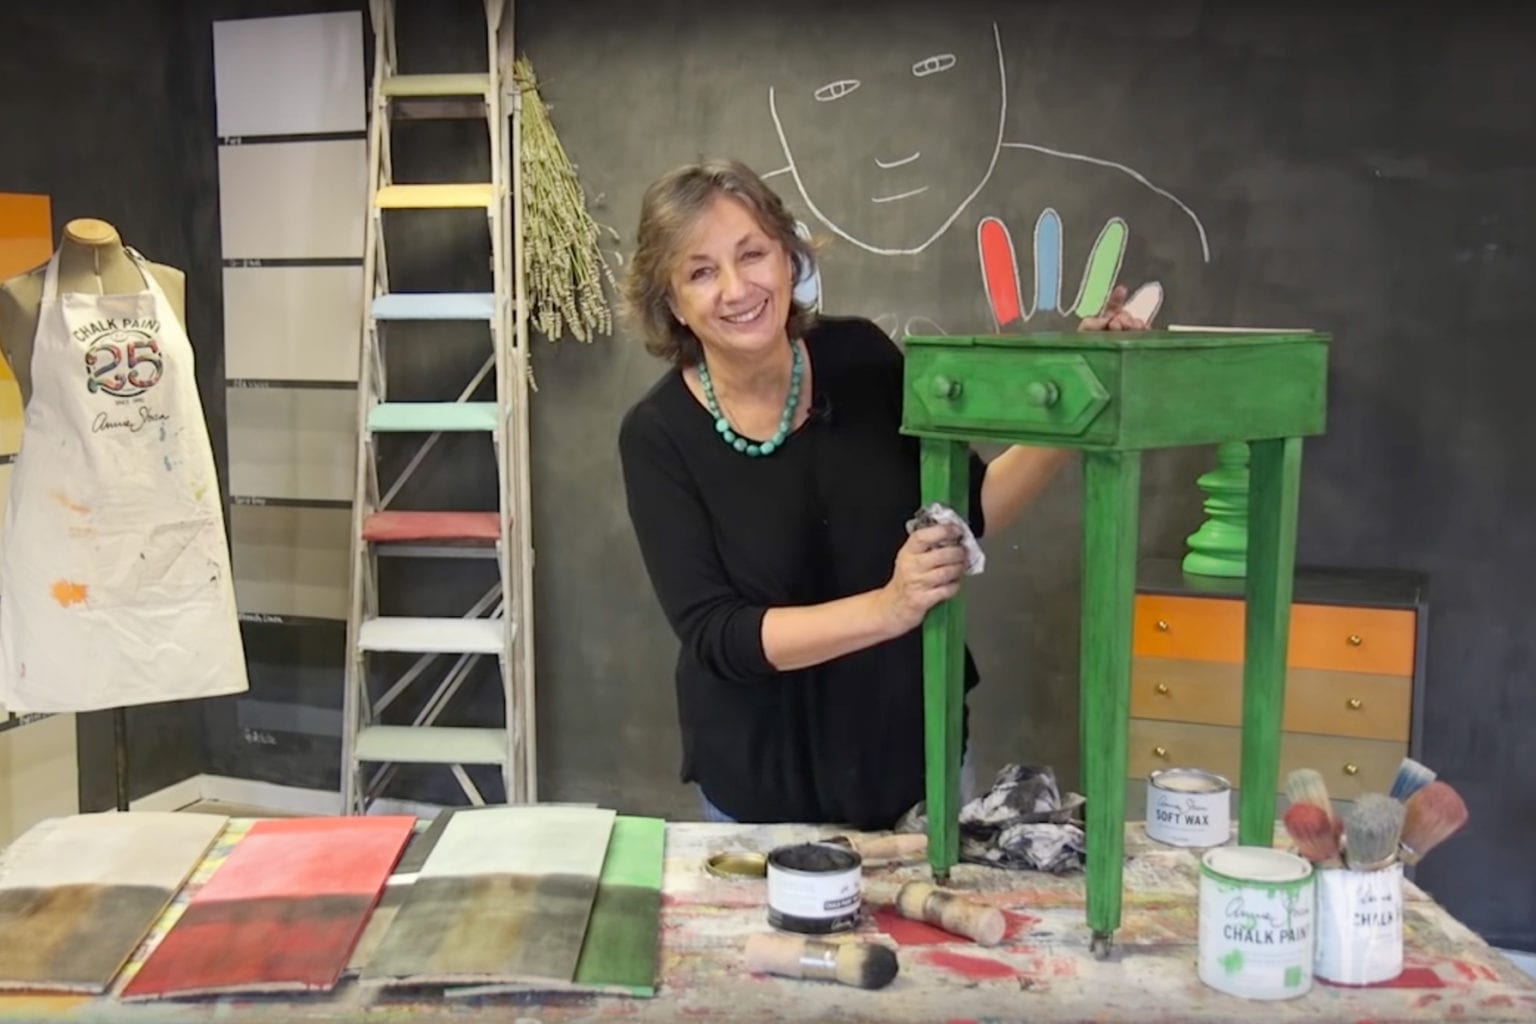
Hello! So what I want to do is show you how to use Dark Wax. It’s probably the thing I get most questions about, but it really is very, very simple. So I’m going to show you how! I’ve chosen this orange piece of pine – I think it’s really quite pretty. I’m going to do it on white and then over the white I’m going to apply a little bit of Dark Wax, so not lots.
I’ve used this brush because it gives you a little bit of texture, not too much. I don’t want it very textured but I do like the idea of having just something so that the Dark Wax can sort of get in and give you a little bit of character. I’m taking big brush marks. I don’t want it to look fussy. The big brush strokes give you a good freedom about it as well, it’ll just make your work look so much nicer. And it’s also quicker.
So now I’m going to do the second coat. I just want to make certain that I’ve got a little bit of texture, but not too much. This is all dry now and I’ve just started to apply wax all over in Clear Wax that seals the whole thing. The thing is if you put Dark Wax immediately on to paint which has got no wax on it at all, you’ve stained it and that’s it, you can’t change it. So this is a way of sealing it so that your next coats… you can play with it and get it darker or lighter and as you want. I’ll just take it with a cloth and wipe the excess, so there’s no lumps or bumps and nasty bits.
What I’m going to do now is I’m going to apply another coat of wax because what I want to do is to be able to work the Dark Wax into the Clear Wax. I don’t want to do it straight on to a dry wax. That gives me time to play. Now I’m going to use brown wax, that’s a Dark Wax, it’s a brownish colour wax. I’m not using my Black Wax. Black Wax is a very different
look it’s a much more modern look, so this is brown and it has a more sort of antiqued look. So don’t need too much, put a bit on there. Don’t worry even if you get lots and lots of it on there because you’ve got Clear Wax underneath it’s not a problem.
Don’t miss any bits – go every which way so you don’t have any white bits showing at all. You don’t want to give the game away. So now I’m going to take a bit of cloth, wipe around, wipe all this off. Now I could leave it like that but I’m not going to because I want something really delicate. See what’s lovely is that it’s gone in, that’s where I sort of stippled it slightly, that’s more brush marks so those initial brush marks that you make are really, really, really important.
So now it’s quite dark, you can see compared to the white paint and that, it’s really quite dark. So I’m going to go back with some Clear Wax and then I’m going to sort of clean it off. Really get it really quite light. I want it to be delicate. So I love this now, I love the way you can see what’s happening it’s like sort of making history really. And what a difference from that yellow pine!
So that’s it! My beautiful antiqued bed.