- Jeśli to możliwe, usuń z mebli wszystkie elementy metalowe. Annie zdjęła z szafki uchwyty.
- Malowanie przy użyciu farb Chalk Paint™ Annie Sloan nie wymaga gruntowania ani szlifowania! Wystarczy się upewnić, że powierzchnia mebla jest czysta i została przetarta środkiem niezawierającym silnych środków chemicznych.
- Wymieszaj farbę Chalk Paint™ w wybranym przez siebie kolorze. Annie zdecydowała się na kolor Old White.
- Zanurz pędzel i nanieś farbę na mebel. Maluj we wszystkich kierunkach i na całej powierzchni.
- Poczekaj, aż pierwsza warstwa będzie sucha w dotyku. W zależności od klimatu może to potrwać od 1 do 3 godzin. Gdy farba wyschnie, nałóż drugą warstwę w ten sam sposób.
- Poczekaj, aż farba całkowicie wyschnie. Następnie nałóż wosk w taki sam sposób jak farbę. Nakładaj we wszystkich kierunkach za pomocą pędzla lub niestrzępiącej się szmatki. Nakładaj wosk na poszczególne części mebla, żeby nie malować w tym samym miejscu!
- Po nałożeniu użyj niestrzępiącej się szmatki, aby usunąć nadmiar wosku. Nie pocieraj zbyt mocno, żeby nie usunąć wosku.
- Gotowe! Możesz używać mebla, gdy wosk będzie suchy w dotyku, ale pamiętaj, że tzw. „okres utwardzania” wosku to 2 tygodnie. W tym czasie obchodź się z meblem bardzo ostrożnie.
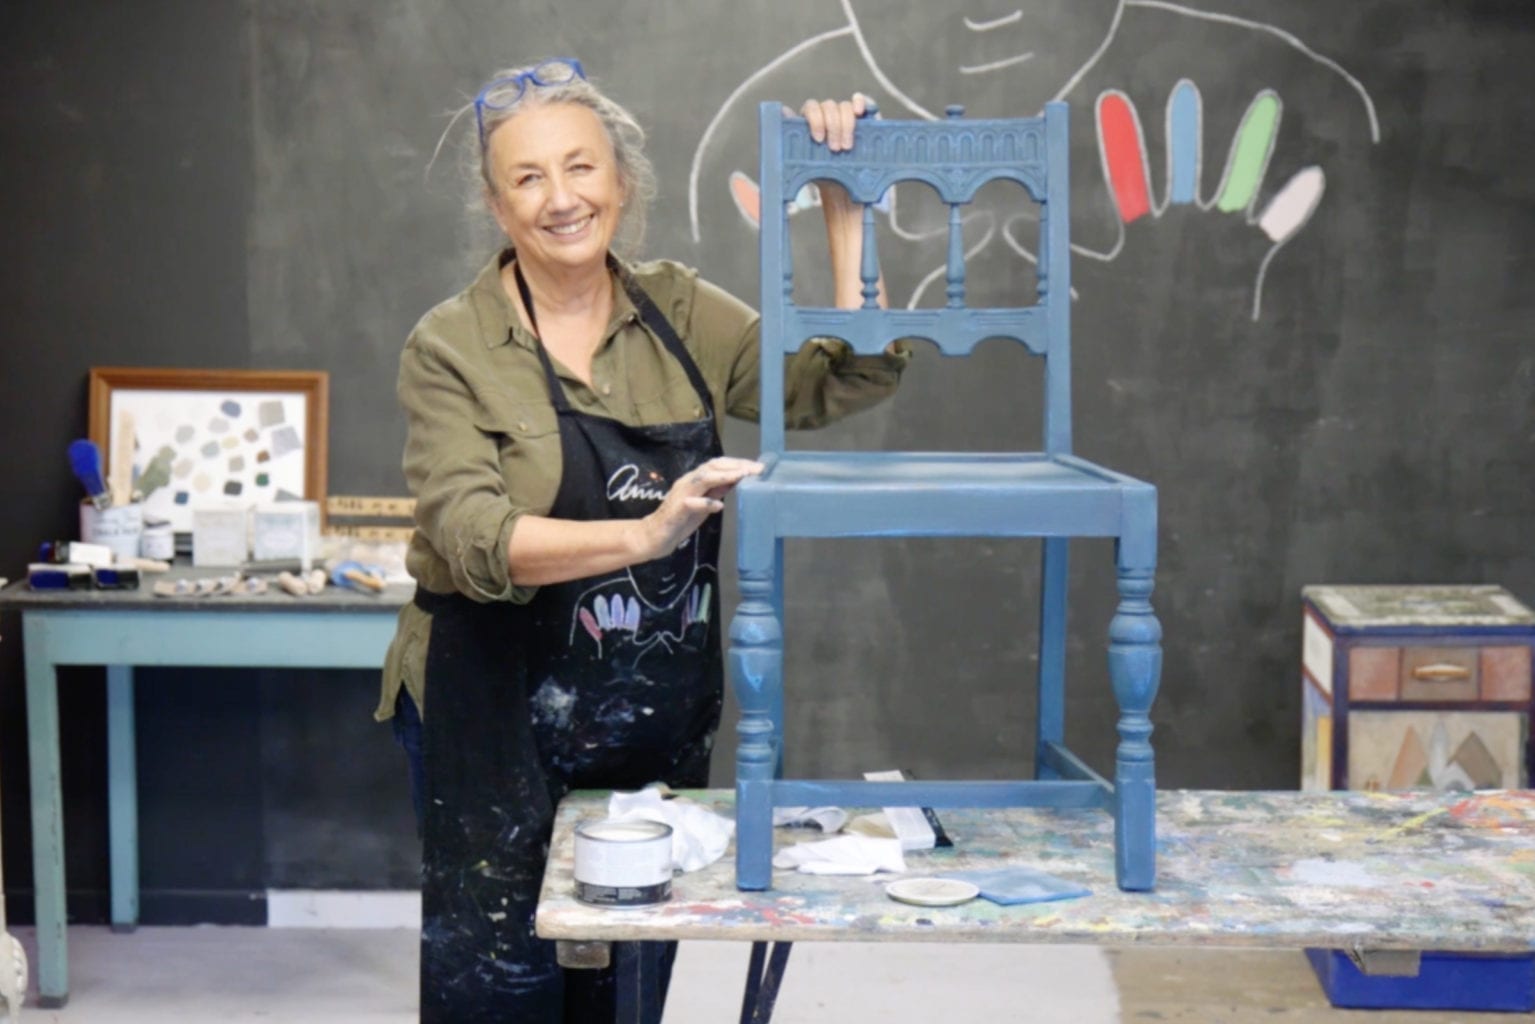
Hello, I’m Annie Sloan and welcome to my beautiful studio! It’s back to basics time. I’m going to be painting this piece. It’s quite shiny, it’s a sort of 30s little cabinet, I’ve taken the handles off so I’m ready to paint.
A lot of people use white, this is my Old White. Ooh, look at that, it’s beautifully thick paint isn’t it? Look at that! If you want to – if it’s very hot weather – you might add a bit of water. If it’s cold – really, really, really cold – you might let it get up to room temperature. But apart from that, we’re ready to go!
Here’s me with my paintbrush and glasses on… and ready to go. So actually I’d probably open the drawers up, but I’m not going to bother this time. Really, we’re just talking about painting. So hold the brush like that – you’re not doing this and don’t flip it back and forward. So if you’re holding it like that… even touching there, so you’ve got real purchase. And just brush over, every which way, be quick, it’s not little tiny, tiny brush strokes – it’s big brush strokes and cover it all over.
You might have noticed there’s no sanding, no priming. I’m just directly on. So no priming, no prepping, no sanding, just paint!
Why? How? How did all this happen? So I was a mother of three small children and they were at school. And what I needed was something that would be quick to do, so that when I collected them in mid afternoon it would all be back to normal. So that’s what I was trying to do – something quick and something that would be easy to do, and that’s what it is.
Second coat now and it’s the same as the first coat! So lots of people say ‘Gosh, you make it look so easy and it’s not so easy’ – it really, really is easy. Remember, if you paint it and you go ‘Oh, I don’t like it’… Well, maybe it’s the wrong colour, and it’s to do with the room you’re in. So maybe it needs to be blue or red or green or pink…try another colour, it won’t take long. This won’t take long at all.
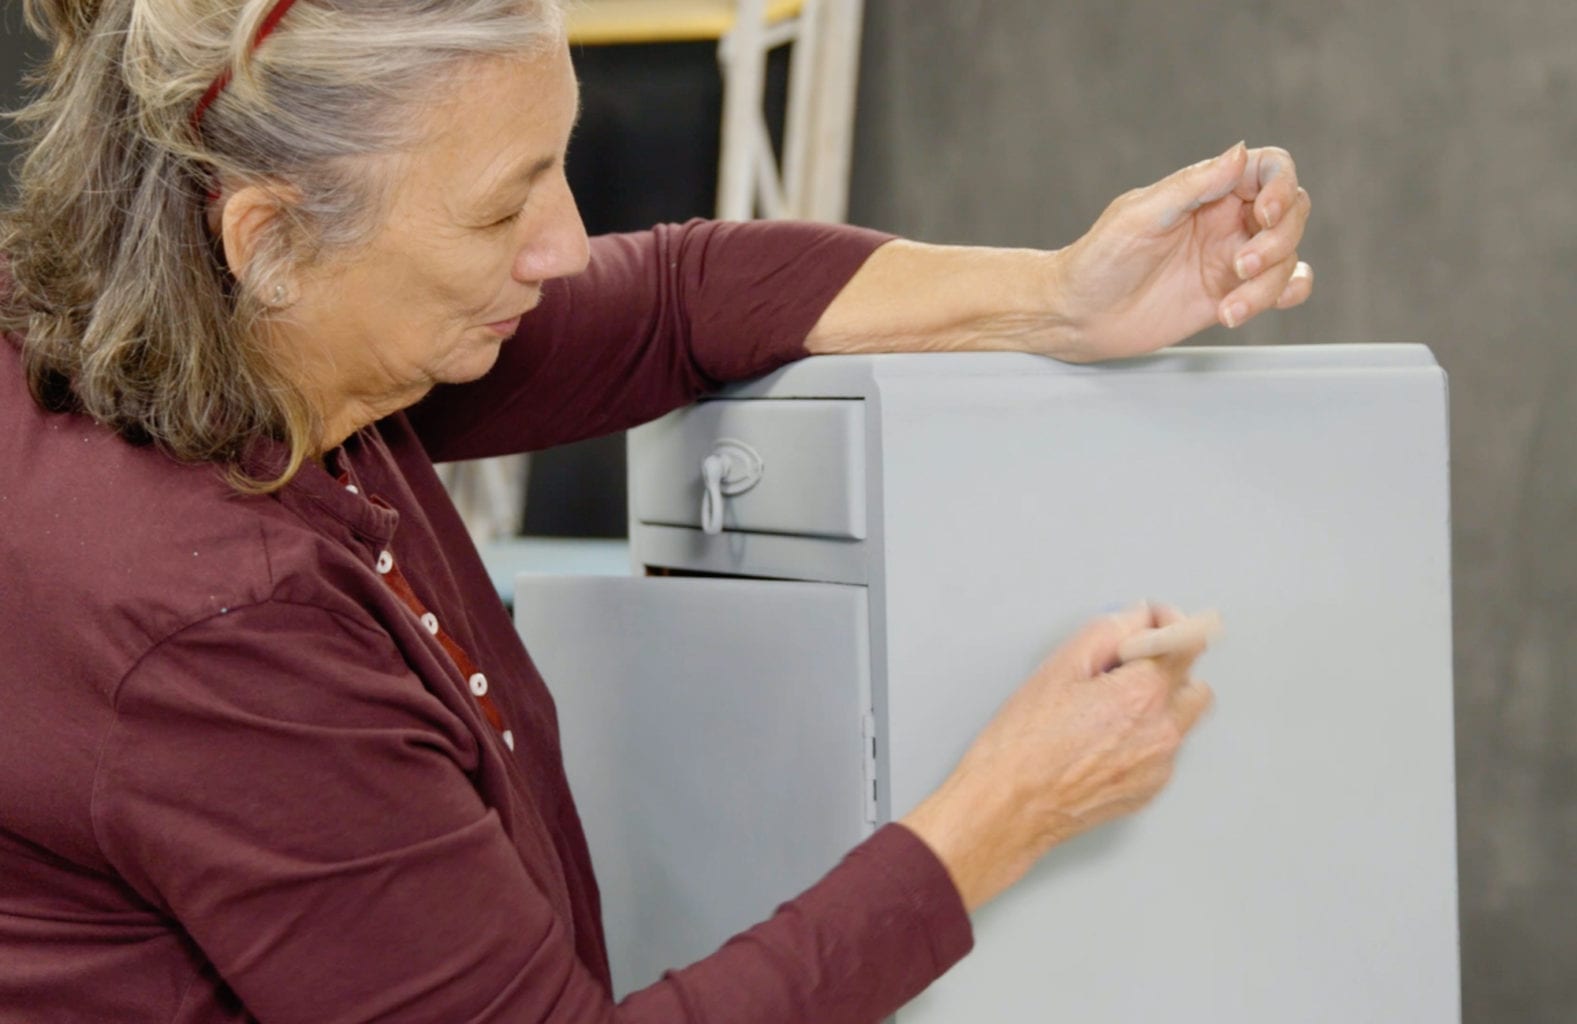
So now it’s back to basics with the waxing, and the waxing is a really, really important part of my whole thing. It’s paint and wax – they’re just two really brilliant bits. So you can put wax on with anything you like. You can do it with an old paintbrush that you’ve got, you can do it with a cloth or you can use this [holds up wax brush]. You don’t have to use this, I would just say that it does make life a little bit easier.
If I don’t wax it at all, my hands will mark it. So you’ve got to wax it to seal it. So it’s to do with look and it’s to do with protection as well. Here’s the Clear Wax. It is wax that works with the paint and it absorbs into the paint really easily. So this is clear – looks white, it’s clear. And you need to put on plenty. And again you’re not doing this thing of going … very careful, really careful. No, go for it! Absolutely go for it! Don’t worry about… you can do whatever direction you want, you don’t have to do it all in one direction.
So I’m doing it in lots of different ways. And you need plenty of it on there. So every which way. And then here’s some cotton cloth. Needs to be lint-free as they say, and then I’m going to wipe over. So take the excess off.
So that’s it! All very very simple: paint, wax, done!