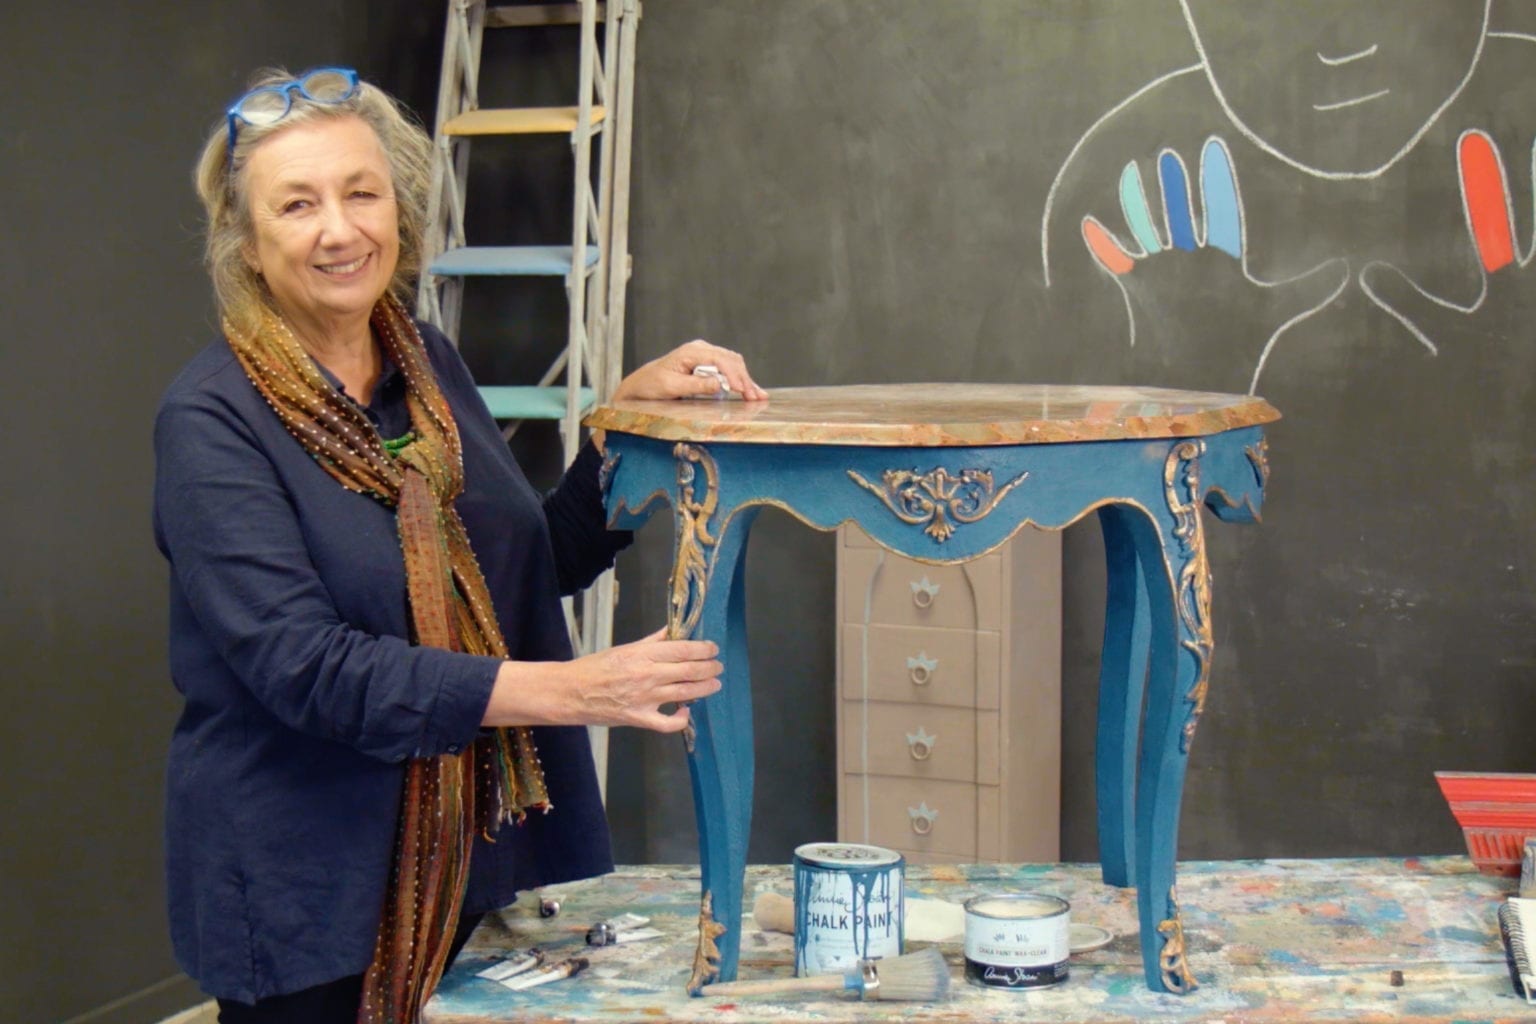
- Wybierz dwa kolory z palety farb Chalk Paint™. Annie wybrała tu kolory Giverny i Aubusson Blue. Rozpoczęła poprzez nałożenie Pędzlem Chalk Paint™ bazowej warstwy farby Chalk Paint™ w kolorze Giverny, aby nadać powierzchni fakturę.
- Gdy kolor bazowy wyschnie, przy pomocy czystego Pędzla Chalk Paint™ nałóż drugi kolor. Annie zastosowała Aubusson Blue i starała się nie nakładać zbyt grubej warstwy farby, gdyż im grubsza warstwa, tym trudniej ją później zeszlifować.
- Gdy farba wyschnie, nałóż warstwę bezbarwnego wosku Chalk Paint™ Wax. Annie zastosowała tu Pędzel do wosku Chalk Paint™, który ułatwia dostanie się we wszystkie rzeźbienia. Przy pomocy niestrzępiącej się ściereczki usuń nadmiar wosku.
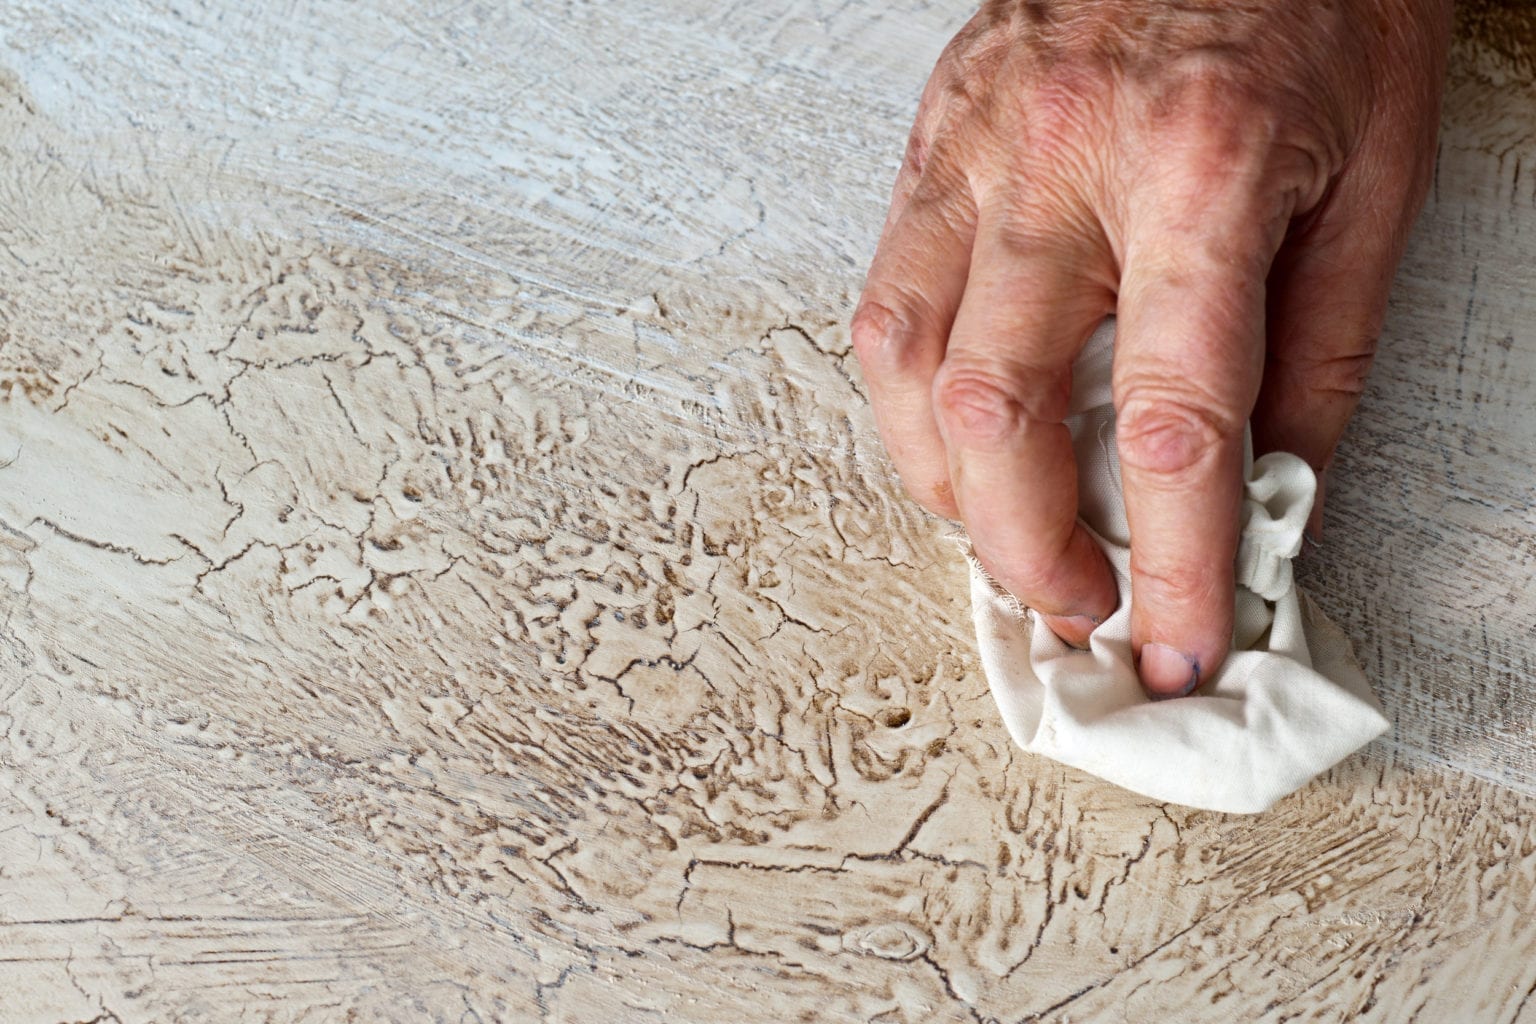
- Gdy wosk będzie suchy w dotyku, ale zanim stwardnieje, możesz rozpocząć szlifowanie. Stosując gąbki ścierne Annie Sloan, Annie usunęła górną warstwę farby, aby odsłonić kolor znajdujący się pod spodem. Rozpocznij, używając gąbki o grubej ziarnistości, następnie zastosuj gąbkę średnioziarnistą, a na zakończenie – drobnoziarnistą, w zależności od mebla, jaki malujesz, i stopnia postarzenia, jaki chcesz osiągnąć.
- Na koniec nałóż warstwę bezbarwnego wosku Chalk Paint™ Wax, który zabezpieczy powierzchnię mebla.
Hello, I’m Annie Sloan. I’m going to show you my signature technique, which is two tone distress. The idea is that you have one colour underneath, you put another colour on top, you wax it, you distress it using sandpaper, and you can see the colour underneath.
I’ve chosen this chair because it’s got quite a lot of really lovely carving, and so when I sand it you’ll see some of the colour and it will really bring it out. I’ve chosen quite bright colours, quite strong colours. The colour underneath, Giverny, is really bright and then I’m going to put on top this colour, which is Aubusson. It’s quite deep, the two colours will make it look quite modern, quite interesting. Of course, this could be completely different if I chose to do it on a rather pretty little French piece, and I could do it in say Paris Grey and Old White or Duck Egg Blue and Old White or something like that. Make it very, very different. But I love the fact that this is a technique which can look completely different.
I’m going to load the brush, not too much on there. Then paint onto here. You see the sort of stabbing motion: that’s to make certain that I get the paint into all the grooves and the carving. If I paint this too thickly, what it means is that it’s more difficult for me to rub it back. So paint it and then spread it out.
So now I’m ready to wax. This is my Clear Wax and this is my Wax Brush, this is a bristle brush it’s nice and pointy and it goes in all the little bits that I need, to all the nooks and crannies. So you get quite a lot of wax on it, not too much – you don’t want to overload it – and then you get going.
So that’s too much. So you’re gonna spread that out a long way, so a small amount of wax does go a long way. I’ll take my cloth and very lightly, not going mad. I’m just removing any excess, that’s all there is.
What the wax does is protect the paint. It also gives it a beautiful finish, quite unlike varnish. Wax is really beautiful, in my opinion. It’s got a very mellow look. The wax hardens over time, so you don’t want to do it and then leave it and then try to sand it. You’re much better to sand it while the wax is fairly fresh. You don’t want to do it when it’s really wet otherwise you’re just removing the wax very quickly and very easily. So just put it on and by the time you finish this whole chair you’ll be ready to go back
to the beginning.
I’ve waxed everything with the Clear Wax and now I’m going to sand it. I’m going to use my Sanding Pads. They’re really good because you’ve got the medium one, that’s the green one. The pink one is a fine one, and the blue one is coarse. Now usually I’ll start with the medium one and the coarse one because the fine one is for when I’ve sort of want to finish
off. You have to see where you are.
Each piece of furniture you can’t just go from rule of thumb. I’d start with a medium and then maybe go on to the coarse one. So I’m just going to gently sand that and work out how far I want to go. Now I find I’m having to rub harder than I want, so I want more to come out so I’m going to use the coarse one now. And very gently – shouldn’t be hard – do you see what’s happened? It’s revealed some of the Giverny there. So I’m going to go more
for that now. And this is now a bit like, well this is getting really, really fun for me because this is where you bring it all to life, and work out what you want.
You can’t do it like you’re just cleaning something: you just polish it all off. You’ve really got to use the – these are great because they’re flexible, you can do them how you want. By using the wax to begin with it doesn’t take it off too easily. Some places I’ve gone right through to the wood there I really like that. I think it works for this very, very nicely.
Now I’m gonna start waxing it back in. So it immediately goes quite a lot darker. I really like this because I’ve got the wood coming through, and the wood is actually coming through rather orange so it looks like it’s another colour but it’s not. So basically what I’m doing is I’m waxing everywhere that I sanded.
So there we are this is my two colour distress chair. That’s it finished! I might put a little cushion on there but that’s it I’m really happy with the way it looks.